Difference between revisions of "Automatic to Manual Transmission Swap"
| (9 intermediate revisions by the same user not shown) | |||
| Line 119: | Line 119: | ||
[[Image:problem02.jpg|frame|center]] | [[Image:problem02.jpg|frame|center]] | ||
| + | |||
| + | |||
| + | |||
| + | As you can see, the slave will bolt into both positions, but on the eagle the front axle and driveshaft are in the way, so the upper position is mandatory. | ||
| + | |||
| + | So to fix it, I broke off the post for the pivot ball, and built my own by welding a bolt to a plate and pressing the old pivot onto the bolt. Then I used self tapping screws through predrilled holes to mount the new pivot in the right position for the upper mount configuration. I would give measurements, but I didn’t measure, I just eyeballed it, I tend to get better results that way.(space and time alter when Im around a welder) '''when done it looked like this…..''' | ||
| + | |||
| + | [[Image:slavecylinderinstall01.jpg|frame|center]] | ||
| + | |||
| + | [[Image:slavecylinderinstall02.jpg|frame|center]] | ||
| + | |||
| + | [[Image:slavecylinderinstall03.jpg|frame|center]] | ||
| + | |||
| + | [[Image:slavecylinderinstall04.jpg|frame|center]] | ||
| + | |||
| + | |||
| + | Now bolt on the bell housing, with fork and throwout bering in place. | ||
| + | my fork seemed to be rubbing the housing, '''so I ground a chunk out like this...''' | ||
| + | |||
| + | [[Image:chunkgrinding.jpg|frame|center]] | ||
| + | |||
| + | |||
| + | |||
| + | The very top bolt on the auto is a long one like the rest, but on a manual its shorter, instead of searching for the right bolt, '''I just used an extra bellhousing alignment dowel as a spacer like this…''' | ||
| + | |||
| + | [[Image:spacerdowel.jpg|frame|center]] | ||
| + | |||
| + | |||
| + | |||
| + | Next bolt up the tranny, it might need to be forced the last 1/2”, but be careful if you use the bolts to pull it into place, it is possible to break an ear off the tranny. also it has to have the GM 10 spline input to match the clutch, or you have to get a custom built clutch. Mine came with a GM 14 spline for the four cylinders, and I bought a new 10 spline input shaft to put in its place for $95 | ||
| + | |||
| + | Now you get to bolt the T case up, but first you have to remove the top right(facing forward of vehicle) stud from the transfer case, it is not used, there is no hole, if it were there it would interfere with the shifter linkage inside the transmission, '''here it is..''' | ||
| + | |||
| + | [[Image:tcstud01.jpg|frame|center]] | ||
| + | |||
| + | [[Image:tcstud02.jpg|frame|center]] | ||
| + | |||
| + | |||
| + | |||
| + | Next I found the flange for the tranny mount is 2” lower on the t-4, and you are unable to use the original mount, so the proper thing to do is to build a custom crossmember, but im short on time, so this is my temporary fix until I get one built. I just sandwiched the crossmember between two hunks of tire sidewall with longer bolts and a piece of flat stock on the bottom '''like this…''' | ||
| + | |||
| + | [[Image:crossmemberfix01.jpg|frame|center]] | ||
| + | |||
| + | [[Image:crossmemberfix02.jpg|frame|center]] | ||
| + | |||
| + | |||
| + | |||
| + | Now go ahead and bolt up the crossmemers, and hook the driveshafts back up. | ||
| + | |||
| + | Bolt the starter back on, and reattach the cover plate. | ||
| + | |||
| + | And bolt the skid plate back on. | ||
| + | |||
| + | No need to modify the shifter hole, mine fit just fine through the original hole, but I need to come up with '''a shift boot that fits the automatic console…''' | ||
| + | |||
| + | [[Image:manualshiftlever.jpg|frame|center]] | ||
| + | |||
| + | |||
| + | |||
| + | Step three linkage and pedals, this part sucks. | ||
| + | |||
| + | First, remove the pivot bolt from the brake pedal rod and switch, then the large pivot bolt from the top of the pedal, remove the pedal and do with it whatever, you wont be using it. (on some models you will want to remove the shelf/ duct thingy and the center console for access) | ||
| + | |||
| + | Now with the pedal out of the way, unbolt the four nuts holding the booster to the firewall, you WILL need the room to install the clutch master cylinder. | ||
| + | |||
| + | Next locate where the slave must go, just above the fuse block, where the flasher relay will fit right underneath it. '''I took a Photo of a friends Kammback for reference…''' | ||
| + | |||
| + | [[Image:pedal01.jpg|frame|center]] | ||
| + | |||
| + | |||
| + | Now there may be a piece of insulation there, but on mine it was precut, I just had to pop the piece out to expose the fire wall. | ||
| + | |||
| + | A hole saw would be perfect for this part, But I couldn’t find the right size, so I marked it with the inner flage as a template and drilled a bunch of little holes in a circle, then knocked out the center '''and cleaned it up with a file…..''' | ||
| + | |||
| + | |||
| + | [[Image:pedal02.jpg|frame|center]] | ||
| + | |||
| + | |||
| + | |||
| + | Now pull the brake cylinder, and booster that was previously unbolted forward and to the side, and you should see the holes you just made right behind, and next to the fenderwell. | ||
| + | |||
| + | Nows the really hard part, slide the master through the firewall and bolt it on, sounds easy, but your arms aren’t long enough to reach both sides of the fasteners. I did it by myself, and wedged a ratchet up against the fenderwell, but it would have been way easyer if I had help.. | ||
| + | |||
| + | After bolting the master to the firewall, I had to build a new resivoir tube, mine was damaged in shipping, but I worked something out. I cut it off at the metal base, then clamped a piece of ¾” vinyl tubing the same lenghth, and '''stuck the vent from the original in the top….''' | ||
| + | |||
| + | [[Image:line001.jpg|frame|center]] | ||
| + | |||
| + | |||
| + | |||
| + | That screwed into the end. The line that came with it was trashed as well, but I used it to make a copy out of brake line, it didn’t have the rubber section, '''so I coiled it to absorb movement…''' | ||
| + | |||
| + | [[Image:line002.jpg|frame|center]] | ||
| + | |||
| + | |||
| + | |||
| + | I bolted the line in place and found it worked better if I turned the coil to the other side, and I sudggest using a smaller coil, and to make it slightly higher up or lower, since it was in just the right spot to interfere with the brake lines. | ||
| + | |||
| + | Now when I bolted on the slave and tried to bleed it, it wouldn’t, so I moved on, only to find later that the seals in the slave were bad, and it is no longer available. But a rebuild kit is for around $16, and that is all It needed. And it took less than 10 minuets to disassemble, pop in the new seals, and put back together. | ||
| + | |||
| + | Now that the lines and master are in place, you can bolt the brake booster back onto the firwall. | ||
| + | Then I bolted in the pedals for the stick, and first found the pushrod for the brakes mounts onto the opposite side on the manual brake pedal, then I found that the clutch pedal I came up with had a slightly different configuration than the Kammback I was looking at as a model. So I welded a bolt to the pedal '''and it came out looking like this….''' | ||
| + | |||
| + | [[Image:pushrodfix.jpg|frame|center]] | ||
| + | |||
| + | |||
| + | |||
| + | Now you can easily bleed the clutch, and make sure all the brakes are working. And bolt on all the extras you may have pulled off the dash for access. | ||
| + | |||
| + | For a shifter, I built a temporary one using another shifter, cut short, and welded onto a piece of tubing with a bolt through it to wedge it against the stub on the tranny, sorry, no pic | ||
| + | |||
| + | As for a shift boot, for now I am looking, and I just have a wad of foam stuffed in the hole to stop the air leak. | ||
| + | |||
| + | If you made it this far, the reverse lights and neutral safety should be easy, | ||
| + | The reverse lights and neutral safety share one common wire. | ||
| + | |||
| + | I did not have a plug for the neutral safety, so I twisted two of the previous wires together, and checked if it would start, It didn’t, but the reverse lights were on, so I twisted a different combo (only three possibilities here) and got it right, it started. | ||
| + | |||
| + | So I crimped on a eyelet and attached it to the reverse light switch, and did the same with the remaining wire on the other side of the switch. (as this is wired, there is no neutral safety, I will rewire it when I find a plug that fits the neutral safety switch, then again, I may just leave it this way, my other two vehicles don’t have it and Im used to it.) | ||
| + | |||
| + | Well, that’s it, Ill add on when I get the shift boot done, but for now it runs, and should get me to Colorado. Ill add and edit as needed, hope this is helpful. | ||
Latest revision as of 16:39, 20 January 2007
Contributed by AMC Eaglen Nest member "monsterbronc"
OK, I did it, the eagle is now a stickshift, and all I can wonder. is why would anybody want an auto? this thing drives sooo much better with a stick, before at 70 mph my foot was on the floor, now its on the floor to get there, but holds speed well at part throttle, ive even broke 85mph. I bet my fuel mileage just went wayyyy up.
1981 AMC Eagle auto to T-4/5 swap
ok, here it is, the complete tranny swap guide thingy.
Disclamer: I am not responsible for anything, got that? If you mess something up or hurt yourself or someone else, its your own fault, not mine.
I also give permission for this to be copied, exchanged, given, moved, reposted, pretty mutch feel free to use this however you want, but under no circumstances is it to be sold. This is free for everyone.
Please bear in mind, I did this in a hurry, and in lower 20’s F weather, outside on my lawn. so if something I did seems unsafe, it probably was unsafe, and you should think of a safer way to do it. For instance I did all the lifting of transmissions and stuff, when Had I been in a shop on a concrete floor, I would have used a jack.
You will need
A t-4 or 5 transmission with GM 10 spline input (you can swap inputs, I did)
A 258 to t-4 or 5 bell housing (try to find one with fork)
A 258 flywheel for 10.4 inch clutch
6 flywheel bolts
6 pressure plate bolts
4 transmission bolts
Clutch kit, includes: Disc; Pressure plate; Pilot bearing; Throwout bearing; and a Disc centering tool
Throwout fork
Eagle clutch and brake pedals
Eagle slave and master cylinder for the clutch, with resivoir and hose
Shifter and shifter boot
Basic sockets and wrenches did the trick, I never needed my ½” drive.
And most importantly GOOD MECHANICAL SKILLS, if changing your oil is complicated, than DO NOT ATTEMPT.
If you don’t have a tourque wrench, I suggest getting one, they come in handy when dealing with drivetrain stuff, Home Depot has a Husky, ½” drive for like $60 or so, and as a mechanic, that’s a DEAL. And its lifetime warrentied, my Matco ones aren’t, and cost over $200 next one I buys gonna be that Husky.
part #s slave rebuild kit brake best- chk351835 lifetime warrenty
clutch kit 10.4 inch disc dynapack- nu1916-2 lifetime warranty
T-4 transmission, out of 81 jeep scrambler, PN unknown
258 bell housing off 83 cj PN unknown (wrong one, had low mount for fork)
pilot bushing federal mogul pb-79
10 spline input shaft 1351085008r, brand unknown
all other parts are off of other eagles, so I do not know specifics
Step one remove the auto, pretty simple
Lift up front of vehicle and set tires on blocks, or pull onto ramps, chock back wheels and apply park brake.
Unbolt any skid plates you might have under the t-case, mine had 5 bolts holding it on. Now disconnect the driveshafts fron the t-case, and just push them out of you way, you don’t need to completely remove them, I didn’t.
Next, unhook the linkages and cut the 3 prong plug off for the reverse lights and the neutral safety, it wont fit the new tranny.
Mine had the shifter on the floor, so go ahead and pull the carpet back a little and remove the shifter plate to expose the hole in the floor.
Place a jack under the tranny to support it, and remove the crossmember, then slowly let the jack down. Now you have acess to the top bolts on the bell housing.
Then I unbolted the studs holding the t-case to the tranny, it dosent matter if the nuts come off or if the studs pull out, you can put the studs back in before you put it back together.
Now place a pan underneath the rear of the tranny, and pull the t-case off. Any oil should be caught by the pan. Slide the t-case out of you way, careful not to damage the speedo cable. And to keep from making too much of a mess, stuff a plastic grocery bag in the end to slow the drip.
Remove the starter and just let it hang, it wont hurt it, I do it all the time.
Pull off the flywheel cover plate, and remove the four bolts holding the tourque converter to the flex plate, you will need to pry the engine over a couple times for this.
Now remove the two side bolts on the tranny, they take a 5/8, then the two above them, 9/16, but remember they have a nut on the other side,(don’t ask me why).
Now remove the dipstick tube(use the pan again, and another grocery bag to fill the hole) Then with the tranny supported undo the three top bolts9/16, and the tranny is free.
Now unbolt the 6 flywheel bolts, and we are ready to start the swap.
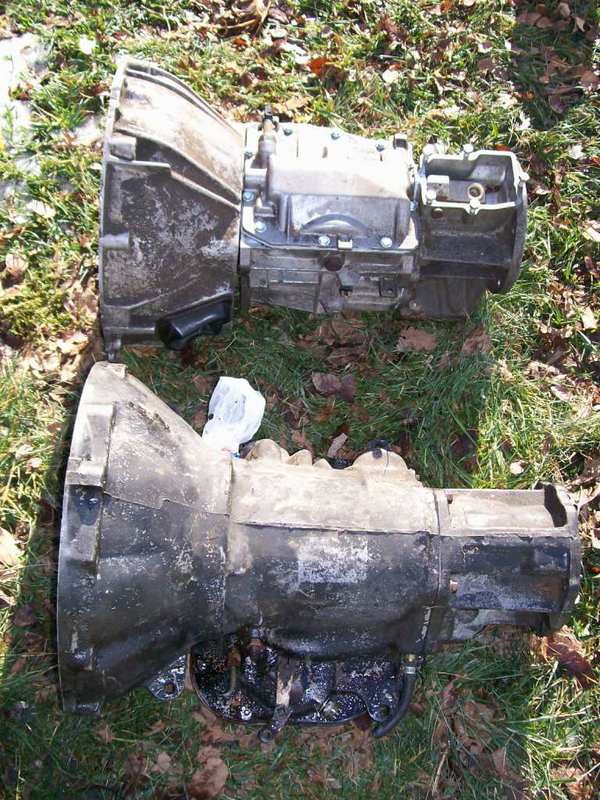
First thing to note is the T-4 is about 1 ½” shorter than the tourquflight, but its not enough to bother the driveshafts…..
Step two clutch install, still pretty simple
With new bolts,(the flexplate bolts are too short, so buy new flywheel bolts for a jeep with a 258) attach the flywheel, if its grooved get it resurfaced, mine was ok, so I just bolted it on as is.
Torque the bolts to 105 ftlbs, per amc tsm.
Now use a brass rod, or a socket and extetion to hammer a well oiled pilot bering into the hole in the crankshaft.
Then use the centering tool to hold the disc in place while you start the bolts for the pressure plate, making sure the disc is centered be feeling around the edges.
Torque the pressure plate bolts to 28 ftlbs per amc tsm.
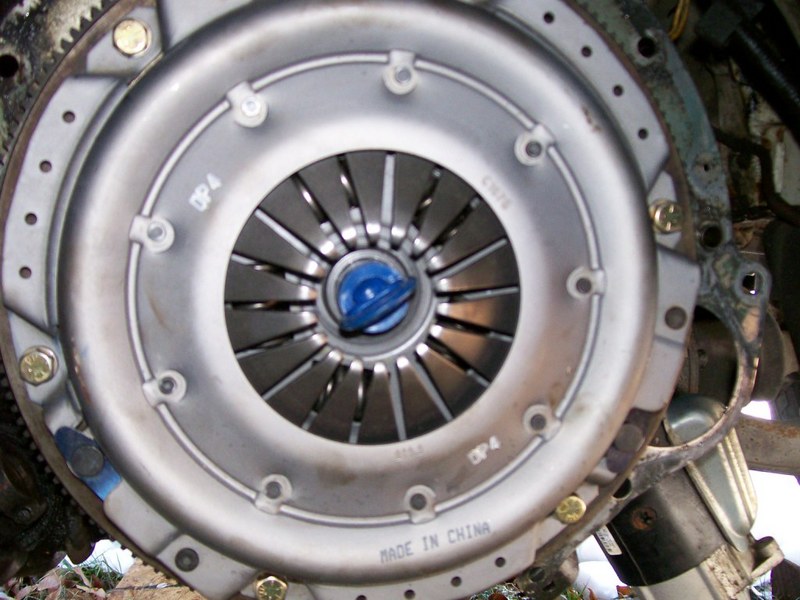
Now it should look like this….
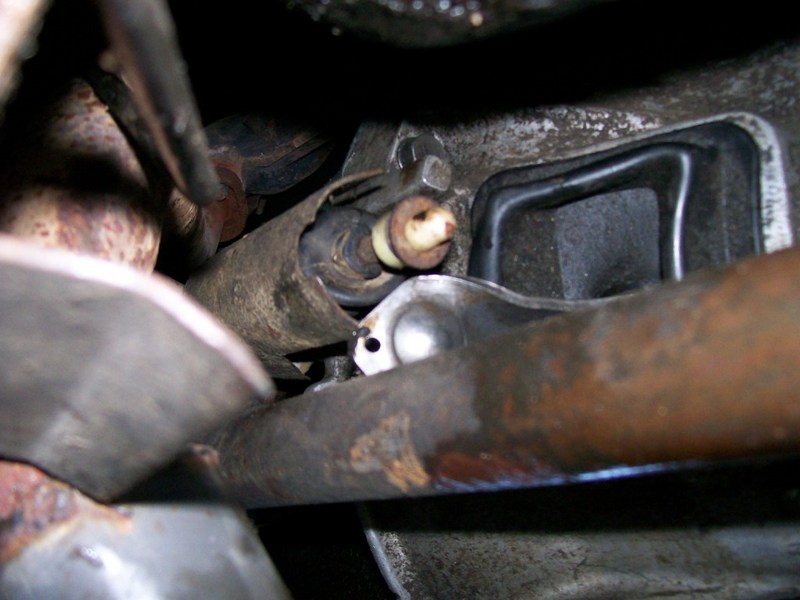
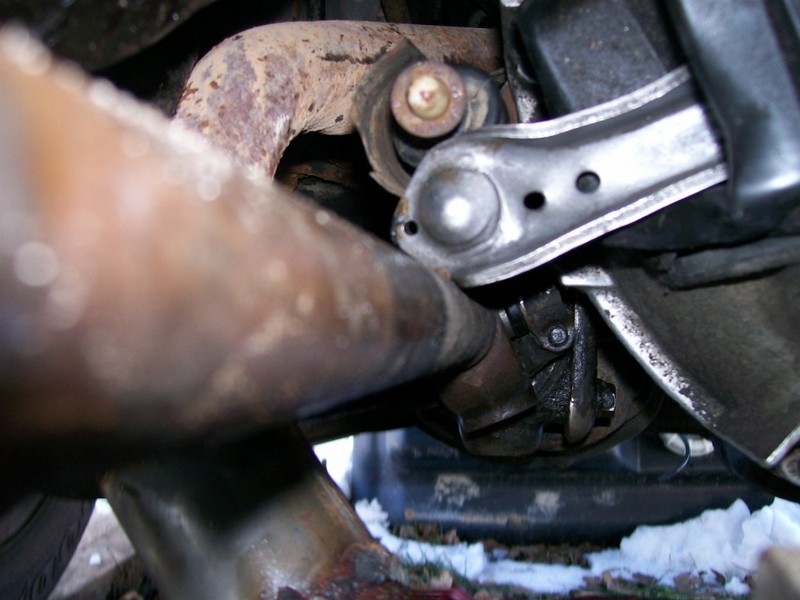
Now its time to bolt on the bell housing, but you need the right one, its best to find out if you have the right one before you get the tranny bolted on, I didn’t. I had the wrong one, and had to pull it all apart again, I actually got the T case bolted on before I figured it out. So I pulled it back apart and modified it, the problem is, that there are two throwout fork configurations, a high and low, an eagle needs a high, or you end up with a problem like this…..
As you can see, the slave will bolt into both positions, but on the eagle the front axle and driveshaft are in the way, so the upper position is mandatory.
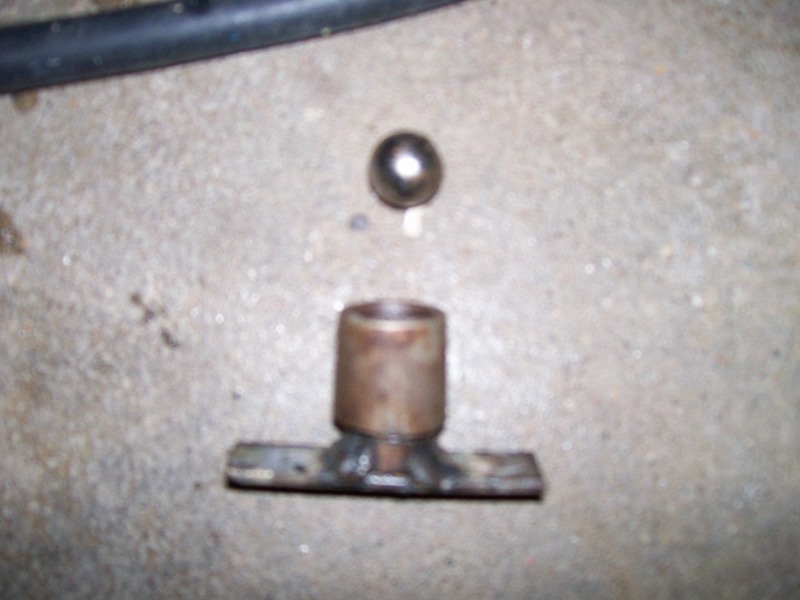
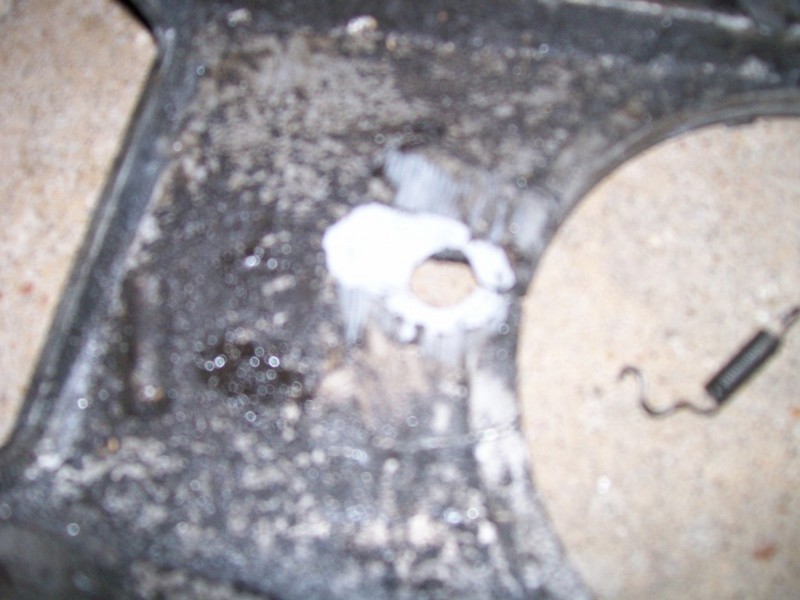
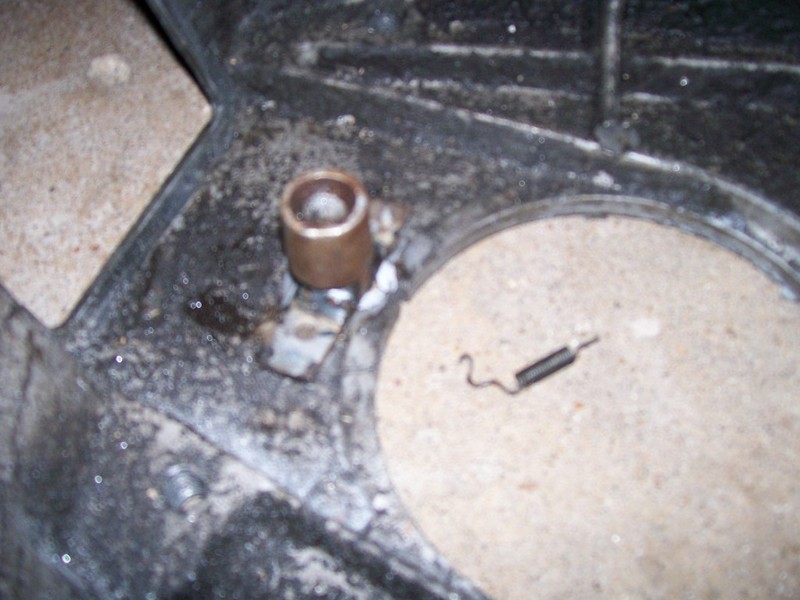
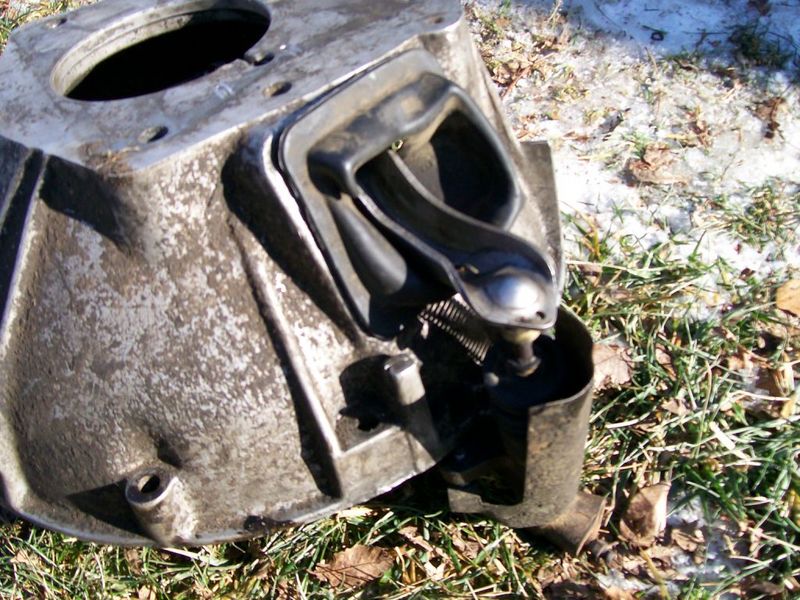
So to fix it, I broke off the post for the pivot ball, and built my own by welding a bolt to a plate and pressing the old pivot onto the bolt. Then I used self tapping screws through predrilled holes to mount the new pivot in the right position for the upper mount configuration. I would give measurements, but I didn’t measure, I just eyeballed it, I tend to get better results that way.(space and time alter when Im around a welder) when done it looked like this…..
Now bolt on the bell housing, with fork and throwout bering in place.
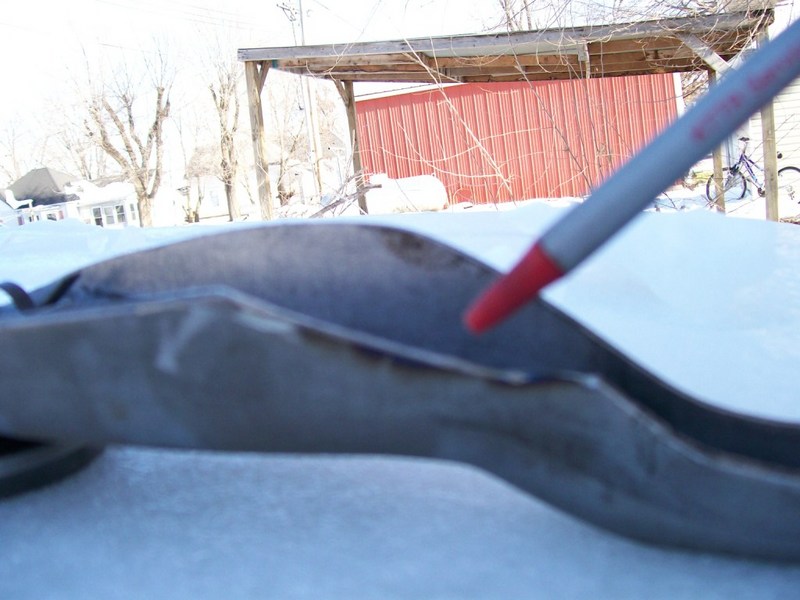
my fork seemed to be rubbing the housing, so I ground a chunk out like this...
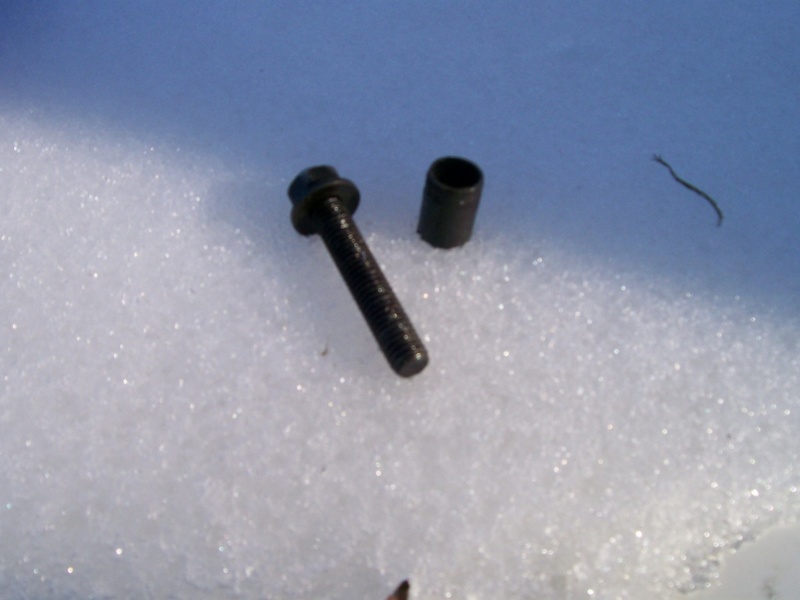
The very top bolt on the auto is a long one like the rest, but on a manual its shorter, instead of searching for the right bolt, I just used an extra bellhousing alignment dowel as a spacer like this…
Next bolt up the tranny, it might need to be forced the last 1/2”, but be careful if you use the bolts to pull it into place, it is possible to break an ear off the tranny. also it has to have the GM 10 spline input to match the clutch, or you have to get a custom built clutch. Mine came with a GM 14 spline for the four cylinders, and I bought a new 10 spline input shaft to put in its place for $95
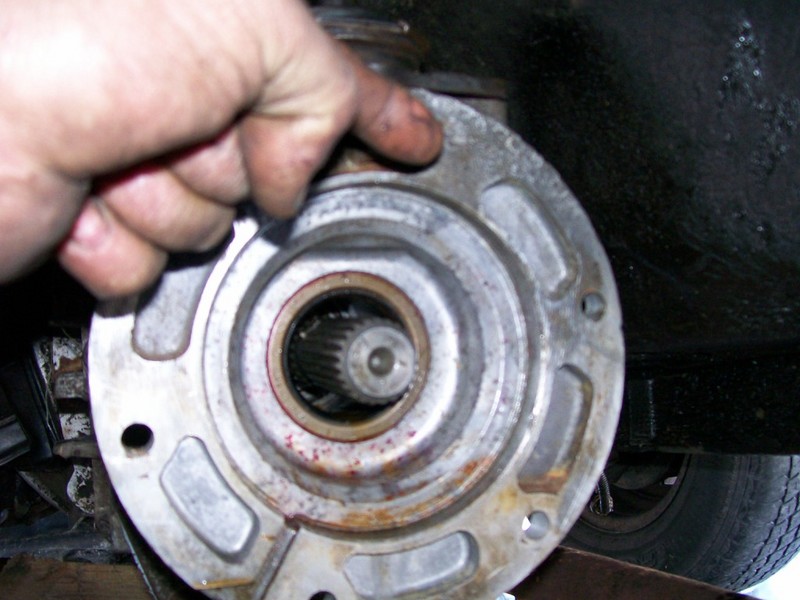
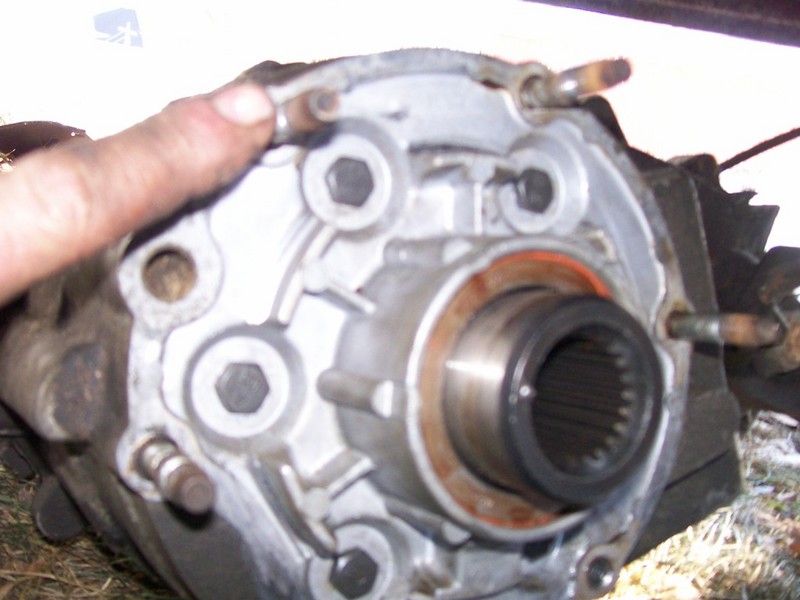
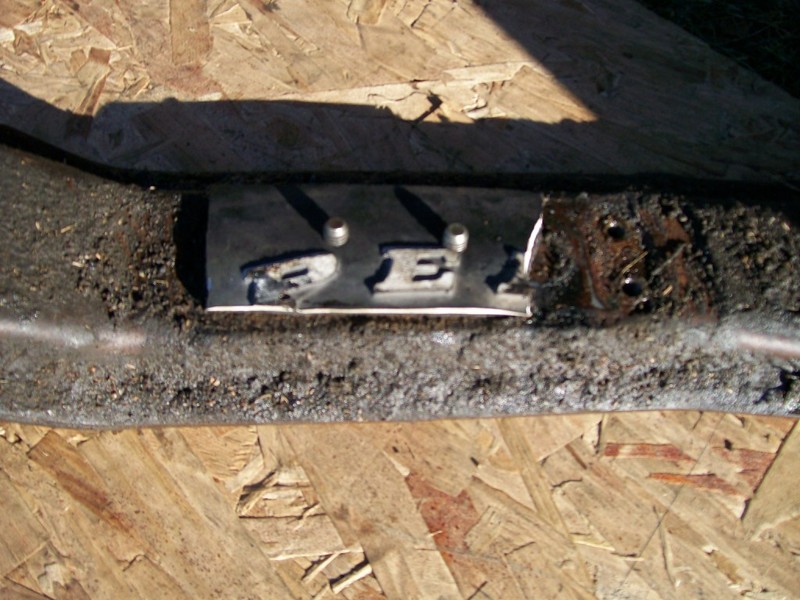
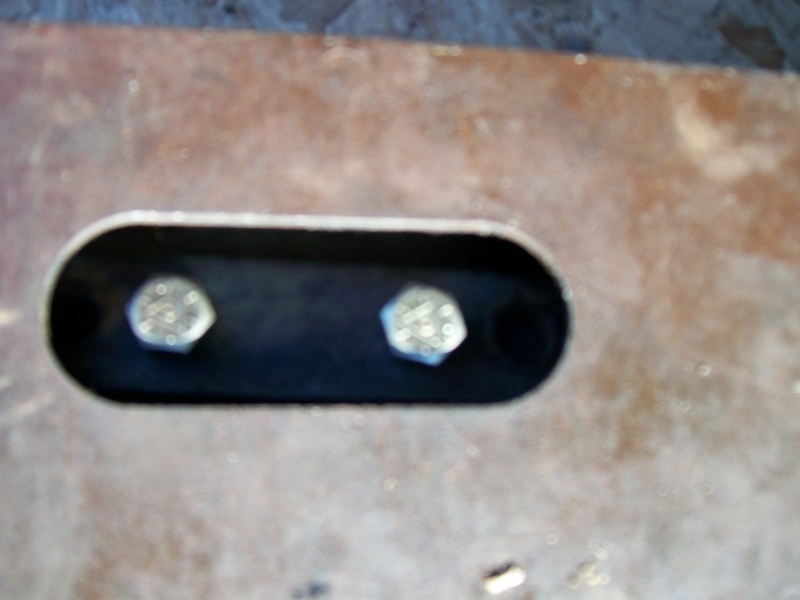
Now you get to bolt the T case up, but first you have to remove the top right(facing forward of vehicle) stud from the transfer case, it is not used, there is no hole, if it were there it would interfere with the shifter linkage inside the transmission, here it is..
Next I found the flange for the tranny mount is 2” lower on the t-4, and you are unable to use the original mount, so the proper thing to do is to build a custom crossmember, but im short on time, so this is my temporary fix until I get one built. I just sandwiched the crossmember between two hunks of tire sidewall with longer bolts and a piece of flat stock on the bottom like this…
Now go ahead and bolt up the crossmemers, and hook the driveshafts back up.
Bolt the starter back on, and reattach the cover plate.
And bolt the skid plate back on.
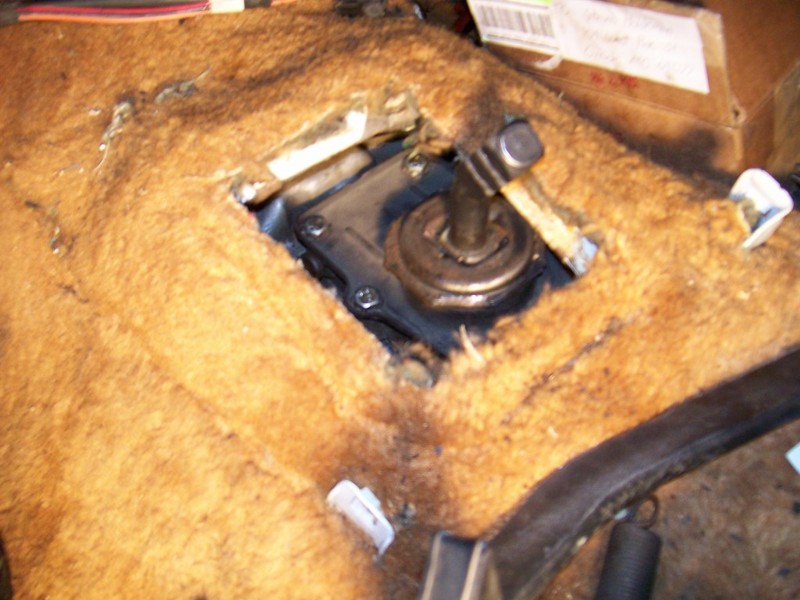
No need to modify the shifter hole, mine fit just fine through the original hole, but I need to come up with a shift boot that fits the automatic console…
Step three linkage and pedals, this part sucks.
First, remove the pivot bolt from the brake pedal rod and switch, then the large pivot bolt from the top of the pedal, remove the pedal and do with it whatever, you wont be using it. (on some models you will want to remove the shelf/ duct thingy and the center console for access)
Now with the pedal out of the way, unbolt the four nuts holding the booster to the firewall, you WILL need the room to install the clutch master cylinder.
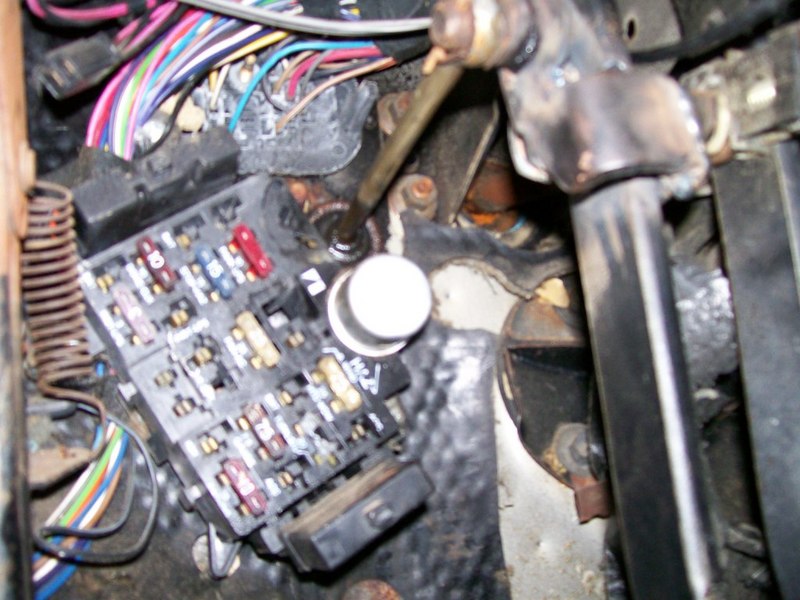
Next locate where the slave must go, just above the fuse block, where the flasher relay will fit right underneath it. I took a Photo of a friends Kammback for reference…
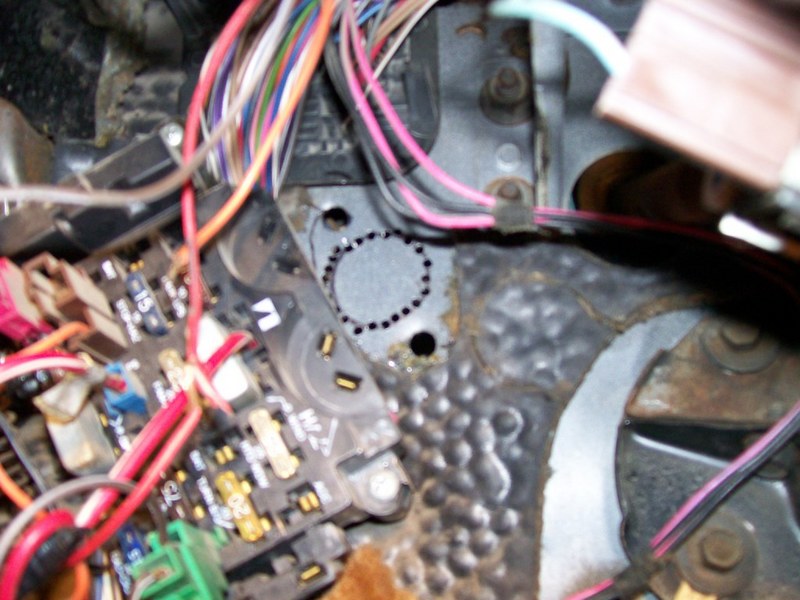
Now there may be a piece of insulation there, but on mine it was precut, I just had to pop the piece out to expose the fire wall.
A hole saw would be perfect for this part, But I couldn’t find the right size, so I marked it with the inner flage as a template and drilled a bunch of little holes in a circle, then knocked out the center and cleaned it up with a file…..
Now pull the brake cylinder, and booster that was previously unbolted forward and to the side, and you should see the holes you just made right behind, and next to the fenderwell.
Nows the really hard part, slide the master through the firewall and bolt it on, sounds easy, but your arms aren’t long enough to reach both sides of the fasteners. I did it by myself, and wedged a ratchet up against the fenderwell, but it would have been way easyer if I had help..
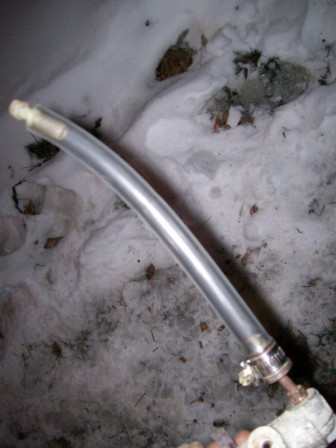
After bolting the master to the firewall, I had to build a new resivoir tube, mine was damaged in shipping, but I worked something out. I cut it off at the metal base, then clamped a piece of ¾” vinyl tubing the same lenghth, and stuck the vent from the original in the top….
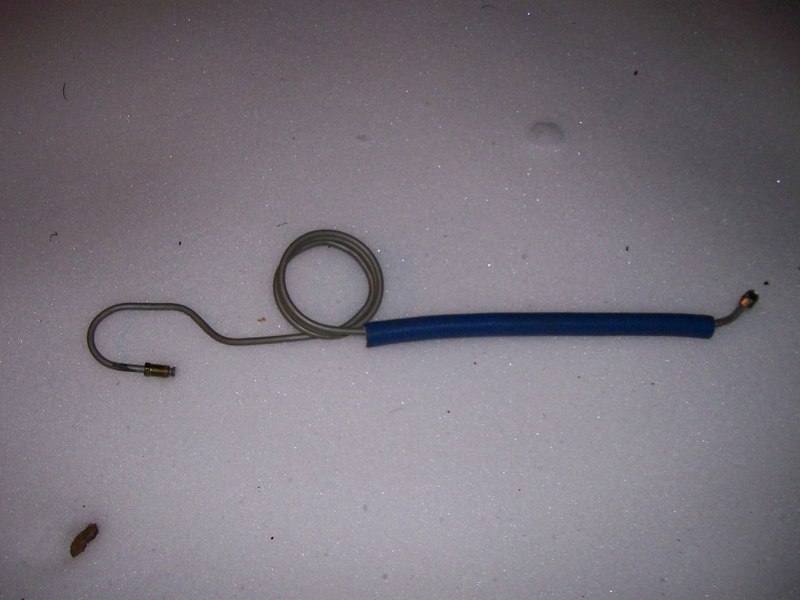
That screwed into the end. The line that came with it was trashed as well, but I used it to make a copy out of brake line, it didn’t have the rubber section, so I coiled it to absorb movement…
I bolted the line in place and found it worked better if I turned the coil to the other side, and I sudggest using a smaller coil, and to make it slightly higher up or lower, since it was in just the right spot to interfere with the brake lines.
Now when I bolted on the slave and tried to bleed it, it wouldn’t, so I moved on, only to find later that the seals in the slave were bad, and it is no longer available. But a rebuild kit is for around $16, and that is all It needed. And it took less than 10 minuets to disassemble, pop in the new seals, and put back together.
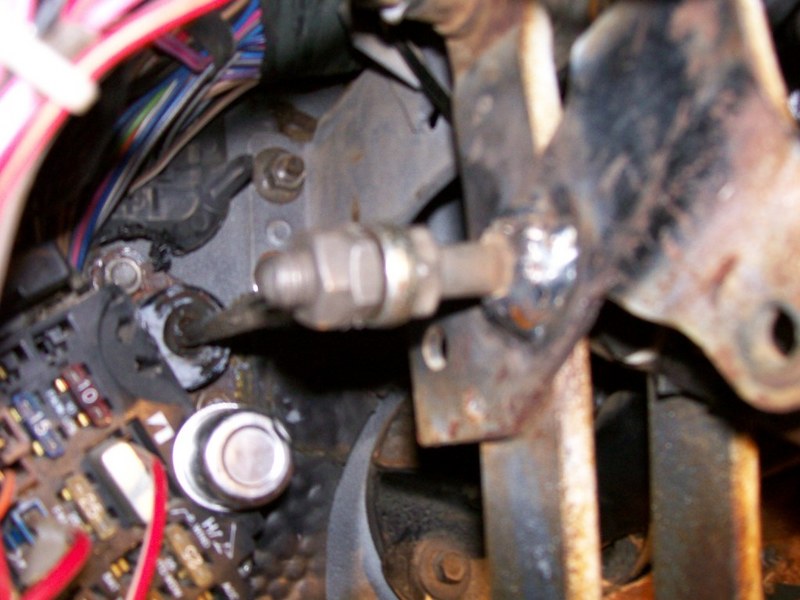
Now that the lines and master are in place, you can bolt the brake booster back onto the firwall. Then I bolted in the pedals for the stick, and first found the pushrod for the brakes mounts onto the opposite side on the manual brake pedal, then I found that the clutch pedal I came up with had a slightly different configuration than the Kammback I was looking at as a model. So I welded a bolt to the pedal and it came out looking like this….
Now you can easily bleed the clutch, and make sure all the brakes are working. And bolt on all the extras you may have pulled off the dash for access.
For a shifter, I built a temporary one using another shifter, cut short, and welded onto a piece of tubing with a bolt through it to wedge it against the stub on the tranny, sorry, no pic
As for a shift boot, for now I am looking, and I just have a wad of foam stuffed in the hole to stop the air leak.
If you made it this far, the reverse lights and neutral safety should be easy, The reverse lights and neutral safety share one common wire.
I did not have a plug for the neutral safety, so I twisted two of the previous wires together, and checked if it would start, It didn’t, but the reverse lights were on, so I twisted a different combo (only three possibilities here) and got it right, it started.
So I crimped on a eyelet and attached it to the reverse light switch, and did the same with the remaining wire on the other side of the switch. (as this is wired, there is no neutral safety, I will rewire it when I find a plug that fits the neutral safety switch, then again, I may just leave it this way, my other two vehicles don’t have it and Im used to it.)
Well, that’s it, Ill add on when I get the shift boot done, but for now it runs, and should get me to Colorado. Ill add and edit as needed, hope this is helpful.
