Difference between revisions of "Timing Chain R & R"
1985amceagle (Talk | contribs) m (Protected "Timing Chain R & R" [edit=sysop:move=sysop]) |
|||
| (2 intermediate revisions by one other user not shown) | |||
| Line 16: | Line 16: | ||
[[Image:tcrr01.jpg|center|frame]] | [[Image:tcrr01.jpg|center|frame]] | ||
| − | |||
| − | |||
| − | |||
The fan shaft flange was really stuck onto the water pump pulley. Even with a few gentle raps with a hammer did not persuade it any. So it was getting dark and I hosed it down with PB Blaster and checked in here for suggestions. I selected for my tools the items seen in the next picture. Using the below tools and a moderate taps on the block which was placed on the fan clutch and angled back toward the engine and while turning the shaft to work it loose I was finally sucessful. Once the flange is past the stud shoulders it will fall off. | The fan shaft flange was really stuck onto the water pump pulley. Even with a few gentle raps with a hammer did not persuade it any. So it was getting dark and I hosed it down with PB Blaster and checked in here for suggestions. I selected for my tools the items seen in the next picture. Using the below tools and a moderate taps on the block which was placed on the fan clutch and angled back toward the engine and while turning the shaft to work it loose I was finally sucessful. Once the flange is past the stud shoulders it will fall off. | ||
| Line 25: | Line 22: | ||
[[Image:tcrr02.jpg|center|frame]] | [[Image:tcrr02.jpg|center|frame]] | ||
| − | |||
To extricate the fan assembly you will need to remove the four fan shroud bolts and then finesse the assembly out from between the radiator and shroud. | To extricate the fan assembly you will need to remove the four fan shroud bolts and then finesse the assembly out from between the radiator and shroud. | ||
| Line 33: | Line 29: | ||
[[Image:tcrr03.jpg|center|frame]] | [[Image:tcrr03.jpg|center|frame]] | ||
| − | |||
Now, I did not think I would have to do this but later into the project I discovered I needed to remove the radiator so that the harmonic balancer puller would have enough clearance to do its job. So if you have the same puller that I will show you in a bit you might as well as do that now. Here is where I am at so far. The hub on the water pump looks brand new. | Now, I did not think I would have to do this but later into the project I discovered I needed to remove the radiator so that the harmonic balancer puller would have enough clearance to do its job. So if you have the same puller that I will show you in a bit you might as well as do that now. Here is where I am at so far. The hub on the water pump looks brand new. | ||
| Line 40: | Line 35: | ||
[[Image:tcrr04.jpg|center|frame]] | [[Image:tcrr04.jpg|center|frame]] | ||
| − | |||
| − | |||
| Line 50: | Line 43: | ||
[[Image:tcrr05.jpg|center|frame]] | [[Image:tcrr05.jpg|center|frame]] | ||
| − | |||
| − | '''Crank Pulley | + | '''Crank Pulley Out.''' |
| − | + | [[Image:tcrr06.jpg|center|frame]] | |
I am now at the point where I can remove the harmonic balancer. But as mentioned before I need to pull the radiator so the puller will fit. So I am writing this as it drains. I did cut my trans cooler lines as the line was twisting when I tried to remove the fitting at the radiator. I will splice the lines back with oil/fuel resistant hose and clamps. | I am now at the point where I can remove the harmonic balancer. But as mentioned before I need to pull the radiator so the puller will fit. So I am writing this as it drains. I did cut my trans cooler lines as the line was twisting when I tried to remove the fitting at the radiator. I will splice the lines back with oil/fuel resistant hose and clamps. | ||
| Line 60: | Line 52: | ||
'''Harmonic Balancer Puller.''' | '''Harmonic Balancer Puller.''' | ||
| − | + | [[Image:tcrr07.jpg|center|frame]] | |
Radiator is out. Not that hard. Only four bolts hold it in place. Of course you need to remove the upper and lower hoses. Good time to replace those if they need it. Overflow hose and transmission cooling lines if you have an auto trans. I then installed the harmonic balancer puller per the instructions. You will need your strap wrench again to hold the crankshaft in place while you wrench. And then, after a lot of pulls on the wrench got her off with no apparent damage. She appears in good shape. | Radiator is out. Not that hard. Only four bolts hold it in place. Of course you need to remove the upper and lower hoses. Good time to replace those if they need it. Overflow hose and transmission cooling lines if you have an auto trans. I then installed the harmonic balancer puller per the instructions. You will need your strap wrench again to hold the crankshaft in place while you wrench. And then, after a lot of pulls on the wrench got her off with no apparent damage. She appears in good shape. | ||
| Line 66: | Line 58: | ||
'''Harmonic Balancer Off #1.''' | '''Harmonic Balancer Off #1.''' | ||
| − | + | [[Image:tcrr08.jpg|center|frame]] | |
'''Harmonic Balancer Off #2.''' | '''Harmonic Balancer Off #2.''' | ||
| − | + | [[Image:tcrr09.jpg|center|frame]] | |
'''Harmonic Balancer Off #3.''' | '''Harmonic Balancer Off #3.''' | ||
| − | + | [[Image:tcrr10.jpg|center|frame]] | |
'''Harmonic Balancer on Bench with Puller still attached so you can see how it goes together.''' | '''Harmonic Balancer on Bench with Puller still attached so you can see how it goes together.''' | ||
| − | + | [[Image:tcrr11.jpg|center|frame]] | |
| Line 91: | Line 83: | ||
'''Timing cover, crankshaft key and oil slinger.''' | '''Timing cover, crankshaft key and oil slinger.''' | ||
| − | + | [[Image:tcrr12.jpg|center|frame]] | |
| Line 99: | Line 91: | ||
'''Shots of the old timing chain and gears.''' | '''Shots of the old timing chain and gears.''' | ||
| − | + | [[Image:tcrr13.jpg|center|frame]] | |
| − | + | ||
| − | + | [[Image:tcrr14.jpg|center|frame]] | |
| Line 110: | Line 101: | ||
'''Shots of the old timing chain and gears out on the bench.''' | '''Shots of the old timing chain and gears out on the bench.''' | ||
| − | + | [[Image:tcrr15.jpg|center|frame]] | |
| Line 117: | Line 108: | ||
'''New timing set installed..''' | '''New timing set installed..''' | ||
| − | + | [[Image:tcrr16.jpg|center|frame]] | |
| Line 146: | Line 137: | ||
'''Cover back on. This picture can also be used as a reference as to where some of the bolts go..''' | '''Cover back on. This picture can also be used as a reference as to where some of the bolts go..''' | ||
| − | + | [[Image:tcrr17.jpg|center|frame]] | |
| − | + | [[Image:tcrr18.jpg|center|frame]] | |
Latest revision as of 19:23, 28 April 2013
By IowaEagle
Have a noise that sounds like a lifter but its coming from the front of the engine. Then there is a good chance your timing chain has too much slack and is hitting the cover.
This is also a good time to replace your hoses and belts since you will have them off anyway. And, if you are wondering about the status of your water pump you might as well do this now since it is accessible.
Some major tools I used.
3/8 " and 1/2" ratchet wrenches and the usual assortment of sockets. I found some bolts for some reason needed a 15mm socket. 1/2" Breaker bar. Open end wrenches, all SAE 3/8" - 3/4" and all in between. I really found a lot of uses for my ratchet wrenches. If you don't have a basic set of these I highly recommend you invest in some. Adjustable strap wrench -- indespensbile too. Screw driver - flat blade. Hammer and piece 'o wood. Harmonic Balancer Puller (about $18). PB Rustblaster and or penetrating oil like WD-40. Tubing cutter if you need to remove your trans cooling lines this way. Bucket for your coolant and trans fluid. Don't reuse either. Scrapers to clean off old gasket on timing cover. Knife to trim oil pan gasket back so new reapir one will fit. And, a pipe wrench.
Parts needed: Timing gear set (Chain, cam gear and crank gear). Gasket set with timing cover seal. Gasket adhesive. Anti-freeze and ATF if you have an auto trans. If you cut your trans cooling lines then you will need four small clamps and appropriate fuel/oil resistant hose.
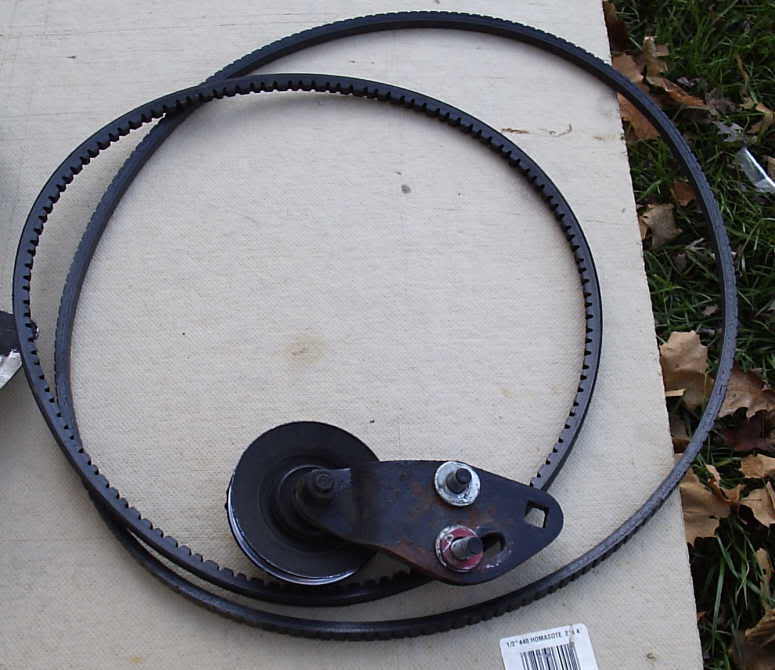
The TSM is a pretty good guide but it does skimp in some areas. So take a deep breath and open the hood. First disconnect the battery. The TSM says to remove the belts first. I left them on so I could push in on the water pump belt while I broke the fan shaft attaching bolts free. After removing those bolts I then removed the water pump - A/C - crank belt and the crank-PS belt. I also removed the idler pulley on the driver's side to make more room to work. And, you need to take off the alternator belt as I discovered later that you need to remove the alternator and its bracket to get to the timing cover.
Belts and idler pulley out of the way.
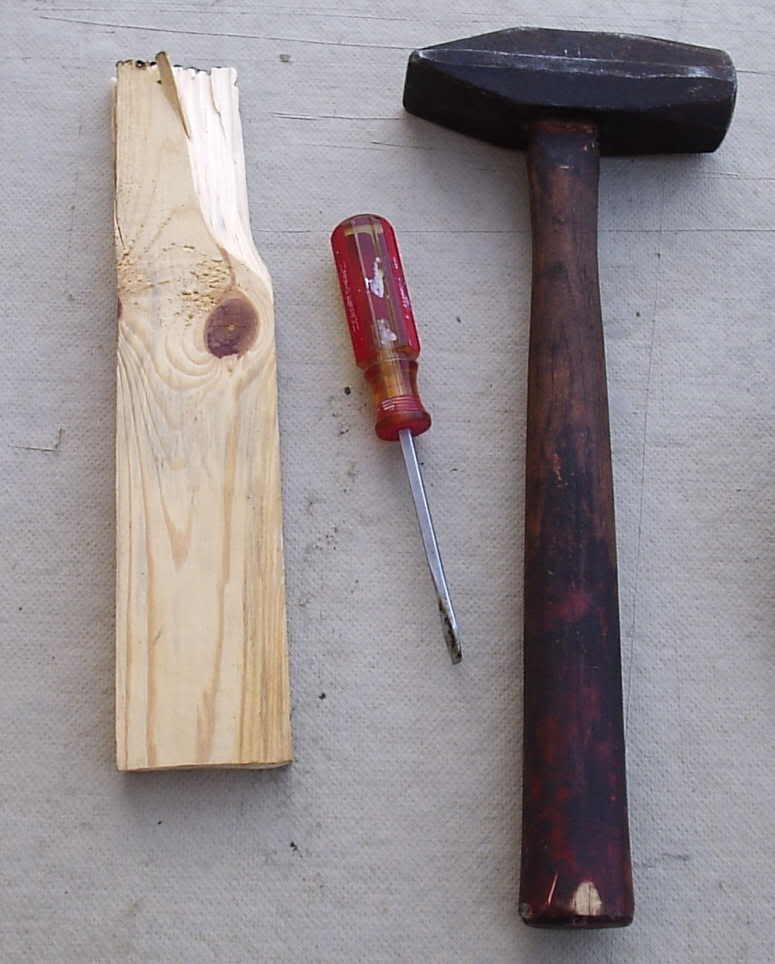
The fan shaft flange was really stuck onto the water pump pulley. Even with a few gentle raps with a hammer did not persuade it any. So it was getting dark and I hosed it down with PB Blaster and checked in here for suggestions. I selected for my tools the items seen in the next picture. Using the below tools and a moderate taps on the block which was placed on the fan clutch and angled back toward the engine and while turning the shaft to work it loose I was finally sucessful. Once the flange is past the stud shoulders it will fall off.
Fan Shaft Flange separator tool set.
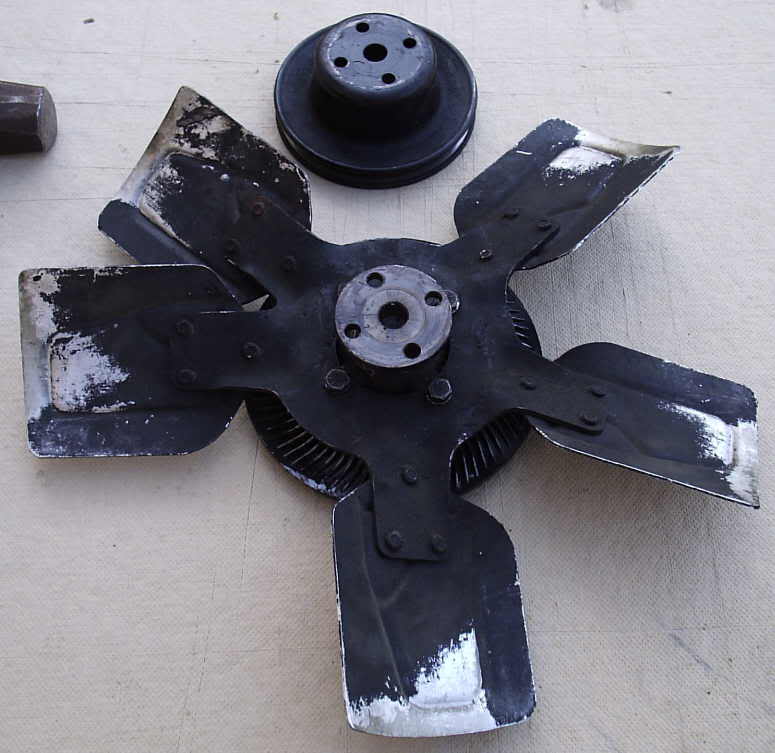
To extricate the fan assembly you will need to remove the four fan shroud bolts and then finesse the assembly out from between the radiator and shroud.
Fan Assembly and Water Pump Pulley are out.
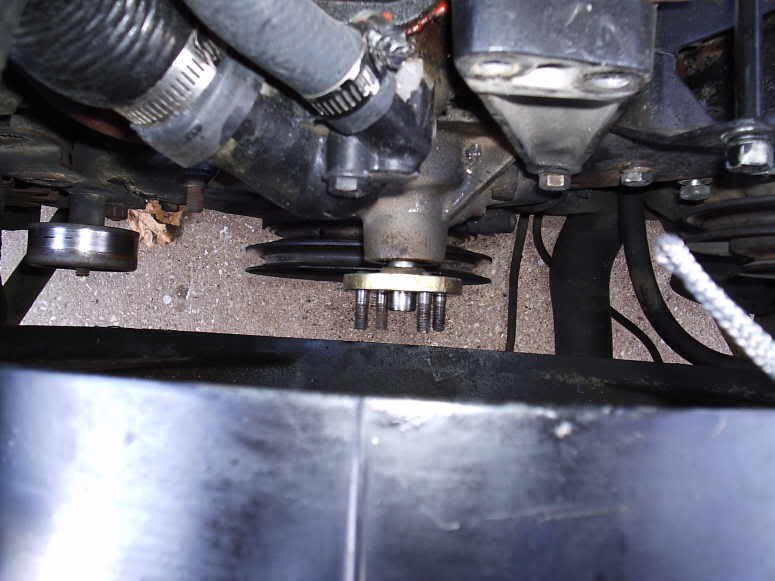
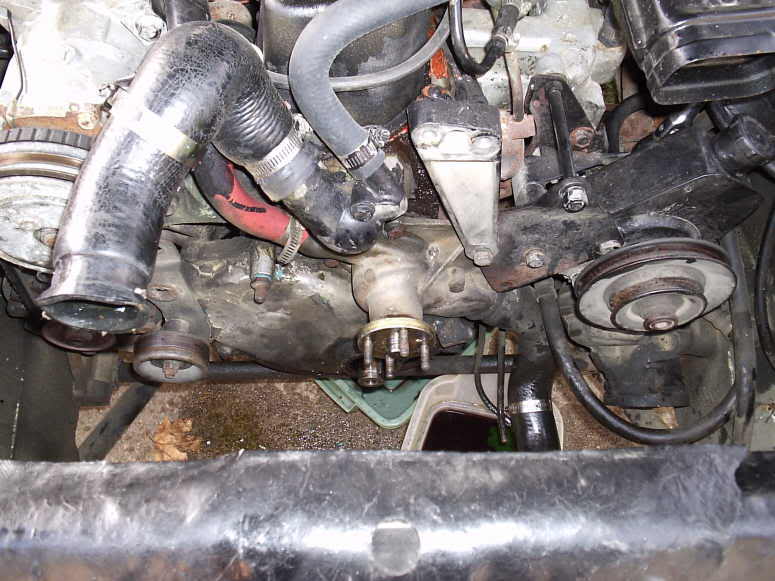
Now, I did not think I would have to do this but later into the project I discovered I needed to remove the radiator so that the harmonic balancer puller would have enough clearance to do its job. So if you have the same puller that I will show you in a bit you might as well as do that now. Here is where I am at so far. The hub on the water pump looks brand new.
Progress So Far.
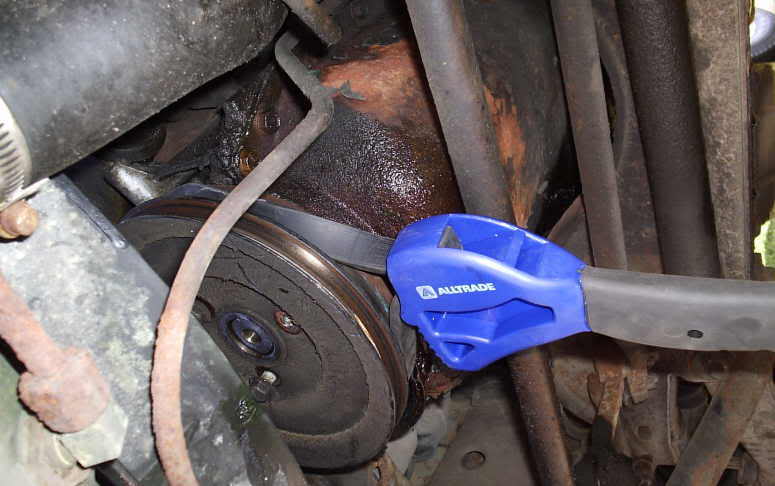
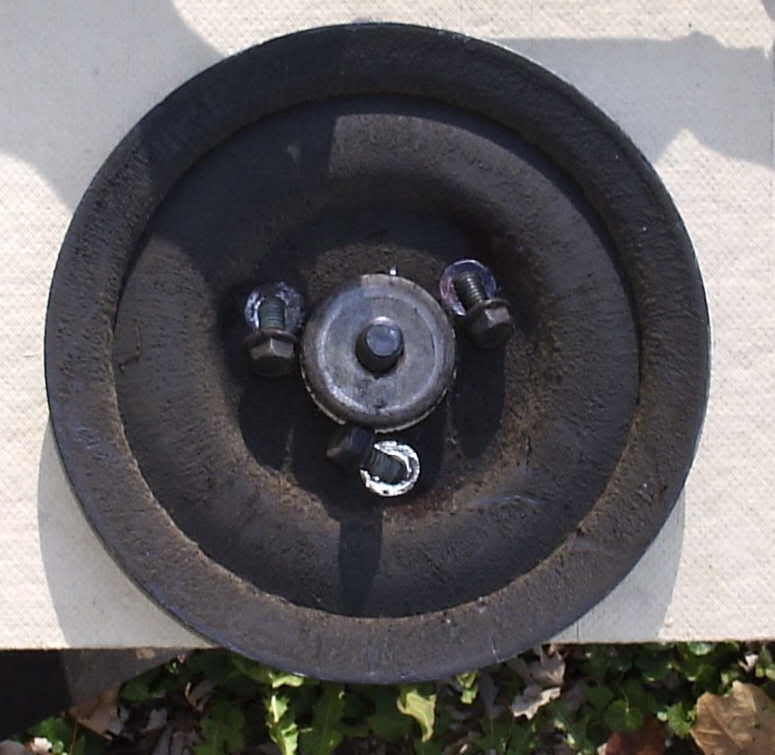
The next step I thought would be to remove the bolt in the middle of the crankshaft pulley. I discovered that the spacer it goes through and into the harmonic balancer fits into the crankshaft pulley. So take out the three smaller bolts around the center bolt and the pulley will fall off. If you have removed your radiator first, like I should have, then you can use air wrenches to break these bolts (and later the center bolt) loose. If you have not removed the radiator or you don't have air wrenches you can try this little trick to hold the crank still while you break bolts free. Get one of those larger strap wrenches and use it to hold the harmonic balancer. You can then easily break the bolts free. Use it again, after the crankshaft pulley is off to break the center crank bolt loose.
Strap Wrench on Harmonic Balancer.
Crank Pulley Out.
I am now at the point where I can remove the harmonic balancer. But as mentioned before I need to pull the radiator so the puller will fit. So I am writing this as it drains. I did cut my trans cooler lines as the line was twisting when I tried to remove the fitting at the radiator. I will splice the lines back with oil/fuel resistant hose and clamps.
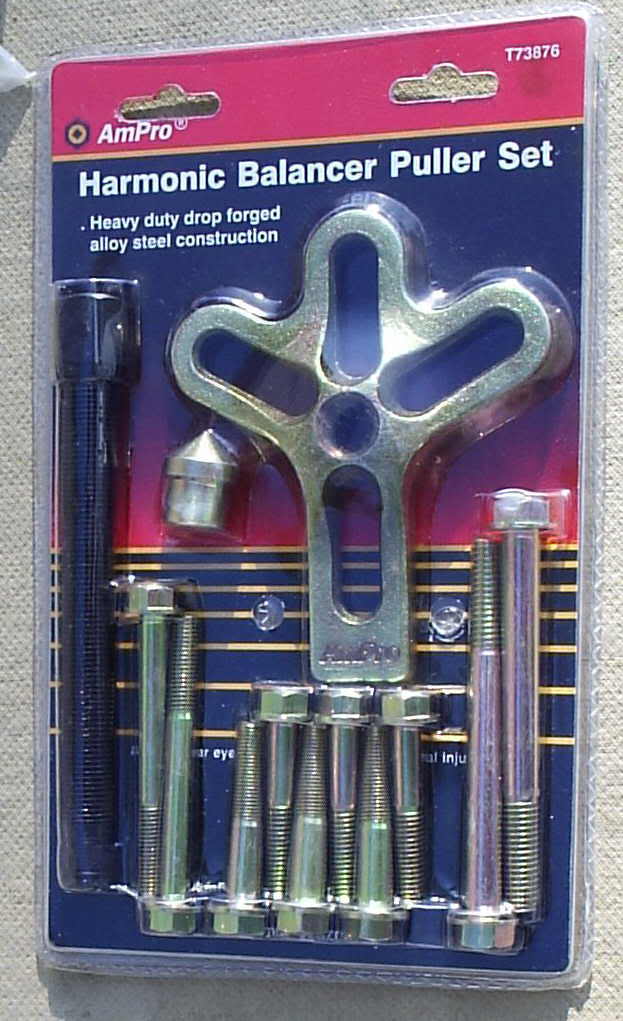
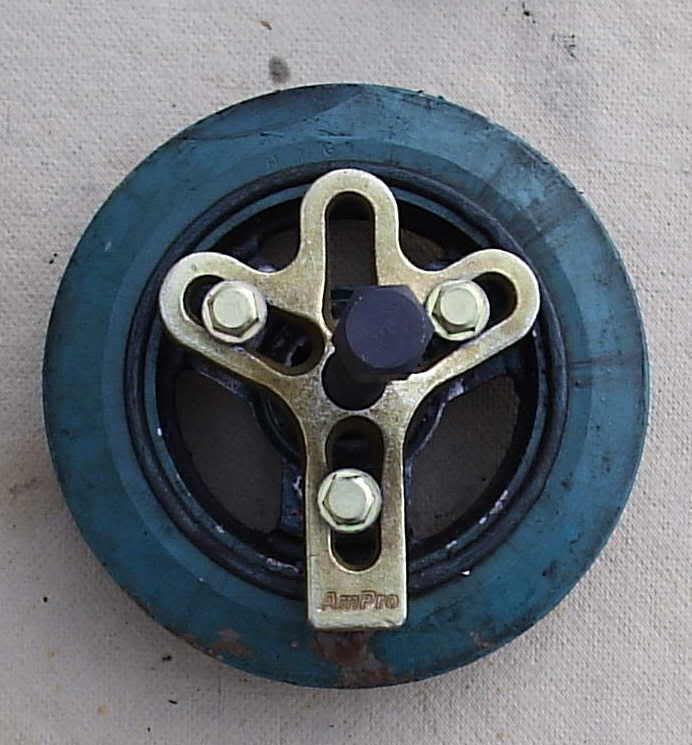
Harmonic Balancer Puller.
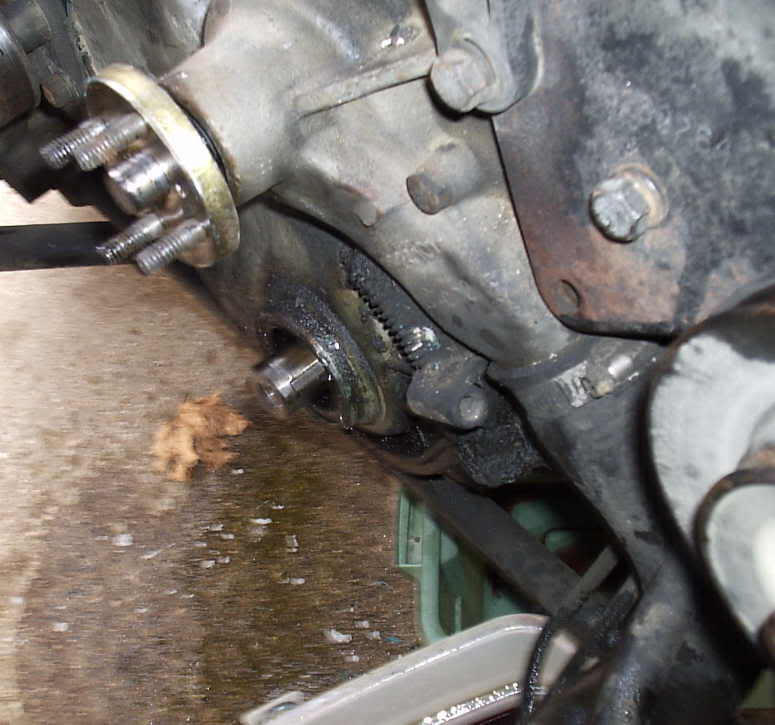
Radiator is out. Not that hard. Only four bolts hold it in place. Of course you need to remove the upper and lower hoses. Good time to replace those if they need it. Overflow hose and transmission cooling lines if you have an auto trans. I then installed the harmonic balancer puller per the instructions. You will need your strap wrench again to hold the crankshaft in place while you wrench. And then, after a lot of pulls on the wrench got her off with no apparent damage. She appears in good shape.
Harmonic Balancer Off #1.
Harmonic Balancer Off #2.
Harmonic Balancer Off #3.
Harmonic Balancer on Bench with Puller still attached so you can see how it goes together.
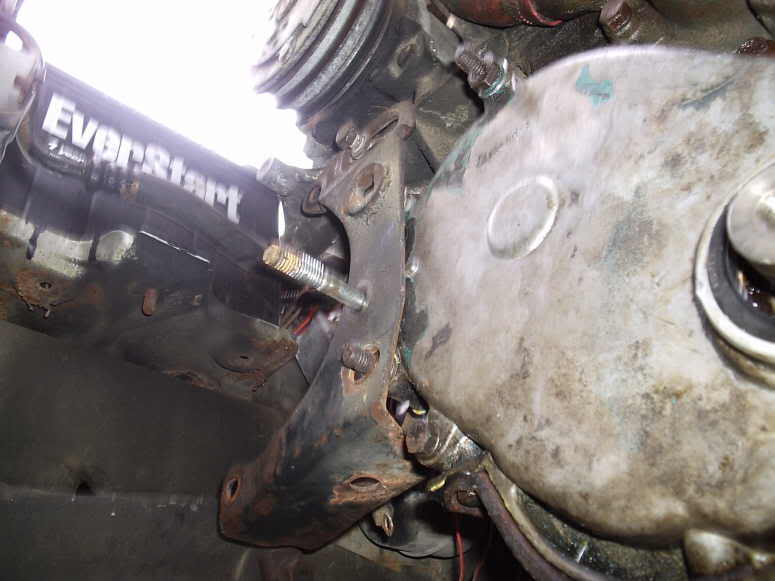
I have one more bolt to take off to remove the alternator -- needed to blast it with PB blaster and let it sit overnight. Make sure and disconnect battery and then the wires to the alternator. Once the alternator bracket is off I will be able to pull the timing chain cover.
Started up today by picking up the timing gear set which had to be ordered. Also filters, oil and antifreeze for the fleet. I ended up having to use a 3/8 drive air ratchet to break that last stubbon bolt, the bottom one that holds the alternator in the bracket. Got her out along with the bracket. If you have an AC car you should remove the AC compressor bracket w/the compressor attached to it. This will make pulling/replacing the alternator and its bracket a piece of cake. Four bolts attach it to th engine and one the alternator bracket bolts also attaches to it. It is heavy so move it to a convenient spot and secure it in place so it will not fall on your body parts.
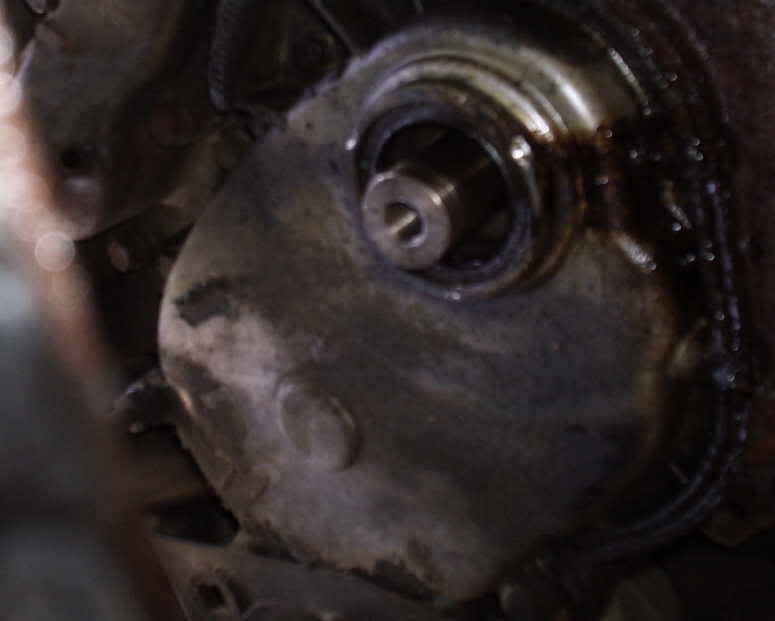
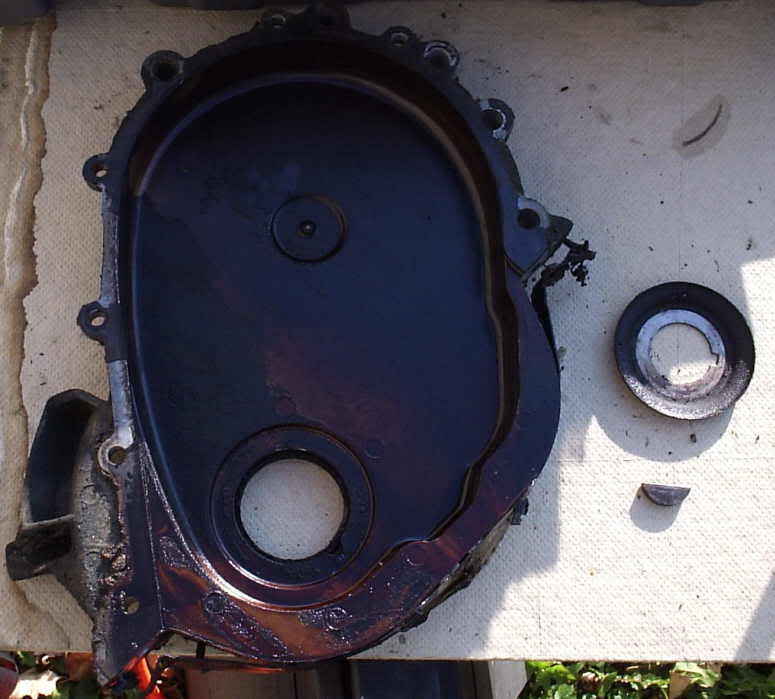
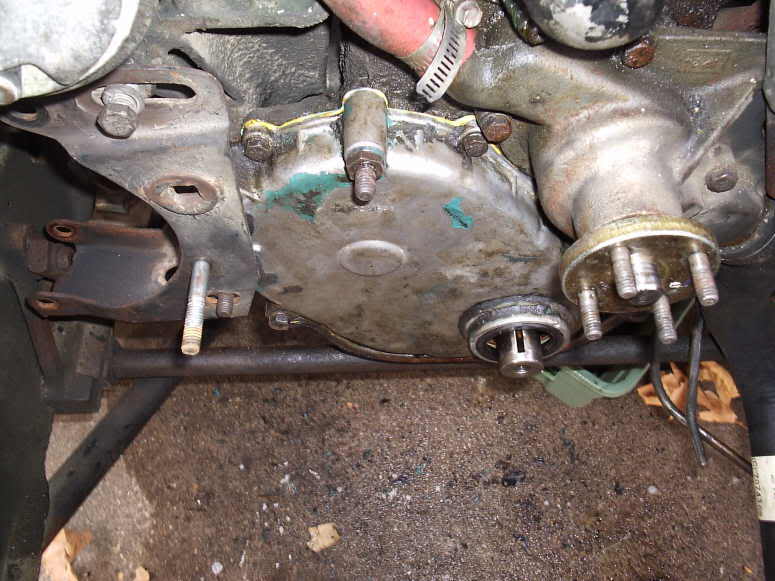
Now to tackle the timing cover itself. If you have not already, remove the key in the crankshaft that secures the harmonic balancer. Make sure and locate all the fasteners that hold the cover on. Some like to hide. Make sure and take the bottom four off that secure it to the oil pan. Most are 7/6" heads, one or two were a 1/2" and the studs w/bolt heads were 11/16". A socket wrench works just fine for these. You may have to gently pry it off but it won't take much to break the seal.
Timing cover, crankshaft key and oil slinger.
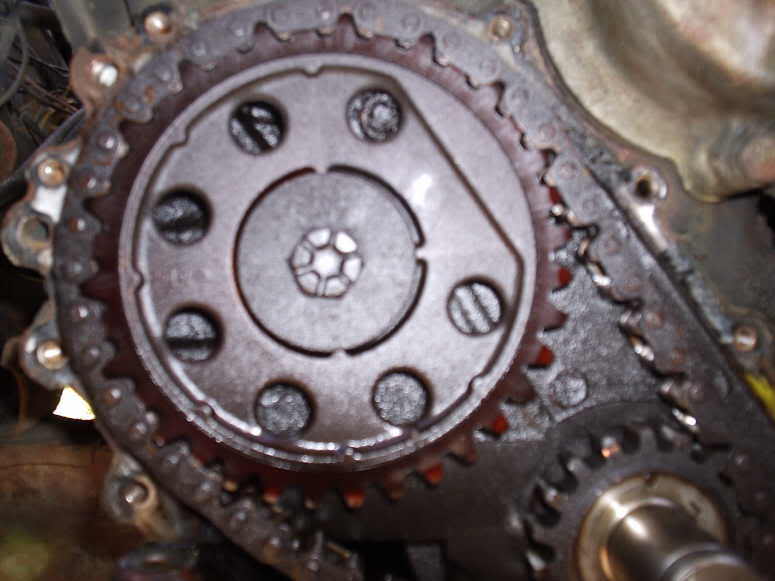
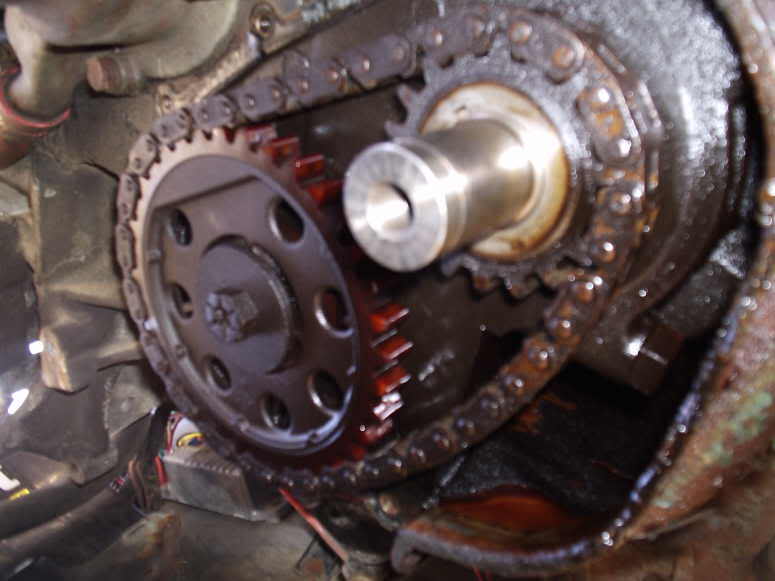
Now the moment of truth. Was it the chain making noise? YES! A ton of slack but no broken teeth on the OE style nylon cam gear.
Shots of the old timing chain and gears.
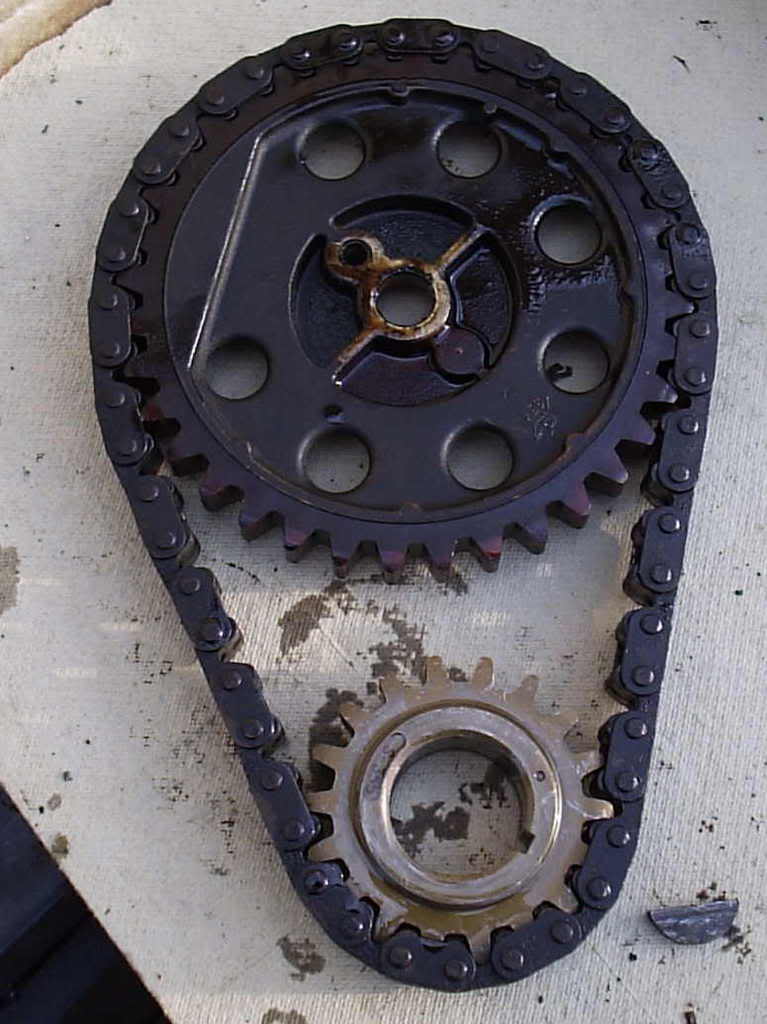
Before taking the old chain and gears off you need to line up the timing marks. If you are pulling OE gears the mark on the crank gear is dot; the mark on the cam gear is an arrow that is very hard to spot. To get my marks to line up I reinstalled the crankshaft pulley bolt along with its spacer. You can then use your 1/2 ratchet wrench with a 3/4" socket to turn the crank until the line up. Once lined up you need to get out your trusty pipe wrench and place it on the cranshaft bolt spacer and then back the bolt out. DO NOT put the pipe wrench on the crankshaft. You can now take off the upper gear, it just pulls off after you remove the bolt and bring the chain along with it. You will need a puller to get cam gear off. Make sure and do not disturb anything while doing all this or you will mess your timing up.
Shots of the old timing chain and gears out on the bench.
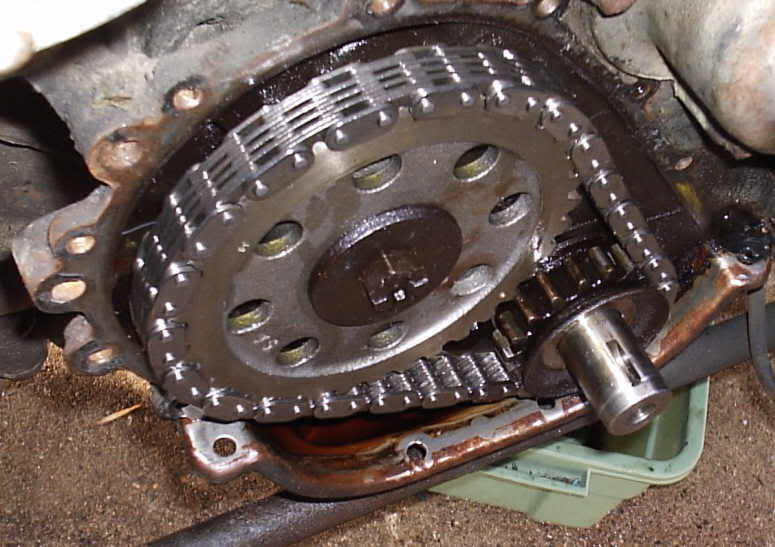
Now assemble the new set with the marks lining up. My new set had dots for the marks. You will then need to install the whole works as a unit. This takes patience. Crank gear goes on first followed by the cam gear. This will take some finessing but it can be done. Now recheck your timing marks. If you are off then reset the assembly again. Reinstall the cam gear bolt.
New timing set installed..
I am now in the process of readying the cover for reinstallation. I first sprayed it down with engine degreaser and washed it off. I removed the old gasket material with a scraper and brass brush monted to my drill. I removed the old seal and installed the new one. Make sure and lube the seal and the housing with oil before installing AND put a good coating of motor oil on the new gears and chain. I also installed the new gaskets and allowing the adhesive its minimum 3 hour set up. Since its dark I will start putting everything back tomorrow. Will also change the oil, check the other vital fluids while I have it in the "repair stall".
Enough for Day One.
Day Two.
Started back this morning. I first pulled off the bottom radiator hose from the pump and put my new one in place. Much easier with nothing in the way. I then inspected the new gaskets on the timing cover and found them well adhered and in good shape. Putting the cover on takes a bit of patience and a certain way of doing it:
1. Orient the cover with the bolt holes.
2. From under the car slide the cover over the crankshaft and slide the bottom part of the cover into place.
3. Inspect the bottom rubber gasket to make sure it is properly in place.
4. Press the rest of the cover in place. It will stay put.
5. Start with the two bottom center oil pan bolts and snug them down good. Then do the same with the two outer ones. One of the smaller diameter bolts that you removed earlier is longer than the others. This one goes on the bottom-front driver's side of the cover. Its location is obvious. Test fit this bolt. If it starts you are OK on that side. If not, then slowly tighten the left side center bolt and the left corner bolt. Test fit the long bolt every so often so you do not overtighten the bottom bolts. This is sort of a self torqing way to make sure the bottom bolts are just right.
6. Now you should have two larger diameter studs that go on the right side. Test fit them both and torque the right bottom center and right bottom end bolts until they fit.
7. Now, all other bolts should go right back in with out any problems. Snug them all down and that part is done.
Cover back on. This picture can also be used as a reference as to where some of the bolts go..
Now you are ready to start putting everything back on. I started with the harmonic balancer. Reinstall the key, line up the harmonic balancer with the key and carefully tap it back onto the crankshaft. Use a piece of wood across the harmonic balancer to protect it from your mallet and to make sure it goes on evenly. It will take some time to get it on far enough where you can use the crank bolt and spacer to press it the rest of the way on. Once its tight that part is done. You can now bolt the crank pulley back on.
Now I reinstalled the rest in the following order:
1. Alternator and bracket. Do not tighten the adjustment bolts yet.
2. Right side idler pulley.
3. AC bracket w/compressor. It takes some finessing to the the front top bolt in but it can be done with your ratchet wrenches.
4. Replace alternator belt, adjust and tighten. Reconnect alternator wires.
5. Remount the driver's side idler, do not tighten as you will need to use it for belt adjustment.
6. Mount the water pump pulley and fan assembly back in place.
7. Reinstall other two belts, adjust and tighten bolts.
8. Place fan shroud back in car but do not attach it. Just move it towards the engine. Make sure it is properly oriented.
9. Reinstall radiator and make hose connections.
10. Reattach fan shroud.
11. Fill radiator with coolant. Should take about two gallons including the reservior to the full mark. One gallon straight anti-freeze and one gallon water.
12. Remove all tools, etc. from under hood. Take a last look at everything to make sure you have not missed anything. You should have not parts left over.
13. Reconnect battery.
If you have done everything right then it will start right up when you turn the key. It did for me.
Listen for any strange noises and check for any leaks. Recheck coolant to see if any needs to be added. If temp guage spikes after a minute or so then you have air in your system.
Test drive and time if needed.
