Difference between revisions of "Pinion Seal Replacement"
| (16 intermediate revisions by the same user not shown) | |||
| Line 21: | Line 21: | ||
[[Image:pinionseal02.jpg|frame|left]] | [[Image:pinionseal02.jpg|frame|left]] | ||
| + | |||
| + | |||
| + | |||
| + | |||
| + | |||
| + | |||
| + | |||
| + | |||
| + | |||
| + | |||
| + | |||
| + | |||
| + | |||
| + | |||
| + | |||
| + | |||
| + | |||
| + | |||
| + | |||
| + | |||
| + | |||
| + | |||
| + | |||
| + | |||
| + | |||
| + | |||
| + | |||
| + | |||
| + | |||
| + | |||
| + | |||
| + | |||
| + | |||
| + | |||
| + | |||
| + | |||
| + | |||
| + | |||
| + | |||
| + | |||
| + | |||
| + | |||
| + | |||
| Line 26: | Line 69: | ||
[[Image:pinionseal03.jpg|frame|left]] | [[Image:pinionseal03.jpg|frame|left]] | ||
| + | |||
| + | |||
| + | |||
| + | |||
| + | |||
| + | |||
| + | |||
| + | |||
| + | |||
| + | |||
| + | |||
| + | |||
| + | |||
| + | |||
| + | |||
| + | |||
| + | |||
| + | |||
| + | |||
| + | |||
| + | |||
| + | |||
| + | |||
| + | |||
| + | |||
| + | |||
| + | |||
| + | |||
| + | |||
| + | |||
| + | |||
| + | |||
| + | |||
| + | |||
| + | |||
| + | |||
| + | |||
| + | |||
| + | |||
| + | |||
| + | |||
| + | |||
| + | |||
| + | |||
| + | Next, remove the u-joint and tape the caps so you don't end up crawling around under the bird looking for that last little piece. If I'd had the money, this would have been a great time to replace the u-joints. | ||
| + | |||
| + | [[Image:pinionseal04.jpg|frame|left]] | ||
| + | |||
| + | |||
| + | |||
| + | |||
| + | |||
| + | |||
| + | |||
| + | |||
| + | |||
| + | |||
| + | |||
| + | |||
| + | |||
| + | |||
| + | |||
| + | |||
| + | |||
| + | |||
| + | |||
| + | |||
| + | |||
| + | |||
| + | |||
| + | |||
| + | |||
| + | |||
| + | |||
| + | |||
| + | |||
| + | |||
| + | |||
| + | |||
| + | |||
| + | |||
| + | |||
| + | |||
| + | |||
| + | |||
| + | |||
| + | |||
| + | |||
| + | |||
| + | Now for the fun part. You SHOULD use the torque wrench to check the torque it takes to break the nut loose, and then re-torque to that spec+5. Wasn't happening for me. I couldn't even break it loose with a breaker bar and my legs. Borrowed an impact wrench and socket (1 1/8") and had to really lean on it, let compressor catch up, and lean on it again. | ||
| + | |||
| + | [[Image:pinionseal05.jpg|frame|left]] | ||
| + | |||
| + | |||
| + | |||
| + | |||
| + | |||
| + | |||
| + | |||
| + | |||
| + | |||
| + | |||
| + | |||
| + | |||
| + | |||
| + | |||
| + | |||
| + | |||
| + | |||
| + | |||
| + | |||
| + | |||
| + | |||
| + | |||
| + | |||
| + | |||
| + | |||
| + | |||
| + | |||
| + | |||
| + | |||
| + | |||
| + | |||
| + | |||
| + | |||
| + | |||
| + | |||
| + | |||
| + | |||
| + | |||
| + | |||
| + | |||
| + | |||
| + | |||
| + | |||
| + | Finally got it. | ||
| + | |||
| + | [[Image:pinionseal06.jpg|frame|left]] | ||
| + | |||
| + | |||
| + | |||
| + | |||
| + | |||
| + | |||
| + | |||
| + | |||
| + | |||
| + | |||
| + | |||
| + | |||
| + | |||
| + | |||
| + | |||
| + | |||
| + | |||
| + | |||
| + | |||
| + | |||
| + | |||
| + | |||
| + | |||
| + | |||
| + | |||
| + | |||
| + | |||
| + | |||
| + | |||
| + | |||
| + | |||
| + | |||
| + | |||
| + | |||
| + | |||
| + | |||
| + | |||
| + | |||
| + | |||
| + | |||
| + | |||
| + | |||
| + | |||
| + | |||
| + | |||
| + | Removed the yoke by gently tapping it out, alternating side to side. | ||
| + | |||
| + | [[Image:pinionseal07.jpg|frame|left]] | ||
| + | |||
| + | |||
| + | |||
| + | |||
| + | |||
| + | |||
| + | |||
| + | |||
| + | |||
| + | |||
| + | |||
| + | |||
| + | |||
| + | |||
| + | |||
| + | |||
| + | |||
| + | |||
| + | |||
| + | |||
| + | |||
| + | |||
| + | |||
| + | |||
| + | |||
| + | |||
| + | |||
| + | |||
| + | |||
| + | |||
| + | |||
| + | |||
| + | |||
| + | |||
| + | |||
| + | |||
| + | |||
| + | |||
| + | |||
| + | |||
| + | |||
| + | |||
| + | |||
| + | |||
| + | |||
| + | Inspect the yoke for wear or grooving. Mine was O.K. with 154,000 miles. Pry out the old seal with seal remover or screwdriver. Let it drain, and wipe everything down. You don't want a stray hunk of something messing up your new seal. | ||
| + | |||
| + | [[Image:pinionseal08.jpg|frame|left]] | ||
| + | |||
| + | |||
| + | |||
| + | |||
| + | |||
| + | |||
| + | |||
| + | |||
| + | |||
| + | |||
| + | |||
| + | |||
| + | |||
| + | |||
| + | |||
| + | |||
| + | |||
| + | |||
| + | |||
| + | |||
| + | |||
| + | |||
| + | |||
| + | |||
| + | |||
| + | |||
| + | |||
| + | |||
| + | |||
| + | |||
| + | |||
| + | |||
| + | |||
| + | |||
| + | |||
| + | |||
| + | |||
| + | |||
| + | |||
| + | |||
| + | |||
| + | |||
| + | |||
| + | |||
| + | |||
| + | Install new seal. I placed the new one in the hole, trying to keep it even. Then used a piece of pvc pipe with a cap and a couple of smart raps with a hammer. You need to get it seated all the way to where it's flush with the housing. | ||
| + | |||
| + | [[Image:pinionseal09.jpg|frame|left]] | ||
| + | |||
| + | |||
| + | |||
| + | |||
| + | |||
| + | |||
| + | |||
| + | |||
| + | |||
| + | |||
| + | |||
| + | |||
| + | |||
| + | |||
| + | |||
| + | |||
| + | |||
| + | |||
| + | |||
| + | |||
| + | |||
| + | |||
| + | |||
| + | |||
| + | |||
| + | |||
| + | |||
| + | |||
| + | |||
| + | |||
| + | |||
| + | |||
| + | |||
| + | |||
| + | |||
| + | |||
| + | |||
| + | |||
| + | |||
| + | |||
| + | |||
| + | |||
| + | |||
| + | |||
| + | Put a little clean gear oil on the yoke and slide it in, watch for your marking paint here. Put the nut back on and tighten her down. If you were able to check the torque on removal, re-torque to that spec+5. I had to lean on the impact wrench several times to get loose, so I leaned on the impact wrench several times to install. | ||
| + | |||
| + | Install u-joint, making sure the caps don't come off. | ||
| + | Finished product... | ||
| + | |||
| + | [[Image:pinionseal10.jpg|frame|left]] | ||
| + | |||
| + | |||
| + | |||
| + | |||
| + | |||
| + | |||
| + | |||
| + | |||
| + | |||
| + | |||
| + | |||
| + | |||
| + | |||
| + | |||
| + | |||
| + | |||
| + | |||
| + | |||
| + | |||
| + | |||
| + | |||
| + | |||
| + | |||
| + | |||
| + | |||
| + | |||
| + | |||
| + | |||
| + | |||
| + | |||
| + | |||
| + | |||
| + | |||
| + | |||
| + | |||
| + | |||
| + | |||
| + | |||
| + | |||
| + | |||
| + | |||
| + | |||
| + | |||
| + | Be sure to refill the rear diff., then test drive. I put newspaper under the diff overnight to check for drips. None. I'll check the u-joint straps here in a few days to make sure they're still tight. | ||
| + | One less puddle under "The Bird". | ||
Latest revision as of 01:02, 28 September 2006
Written by AMC Eagle Nest Member "Trapper Jack"
Things you will need
Seal I used from Advance Auto--part #470331N (Federal-Mogul)
1 1/8" socket for pinion nut
3/8 socket for u-joint
Tape to tape up caps on u-joint (don't want to lose the innards)
Drain pan to catch gear oil.
Breaker bar, torque wrench, impact wrench if you can round one up.
Paint or something to matchmark before removal.
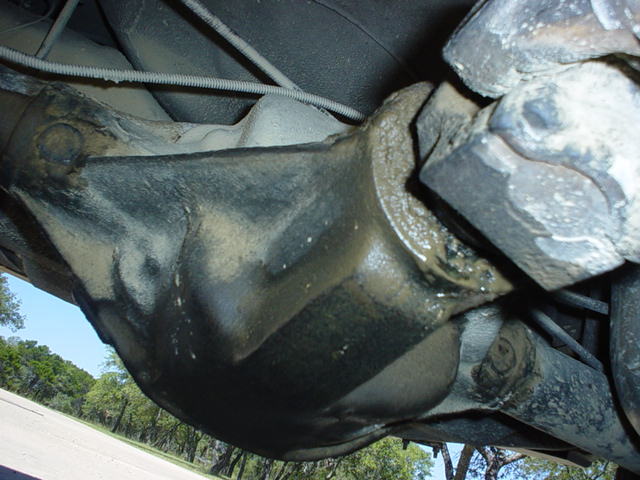
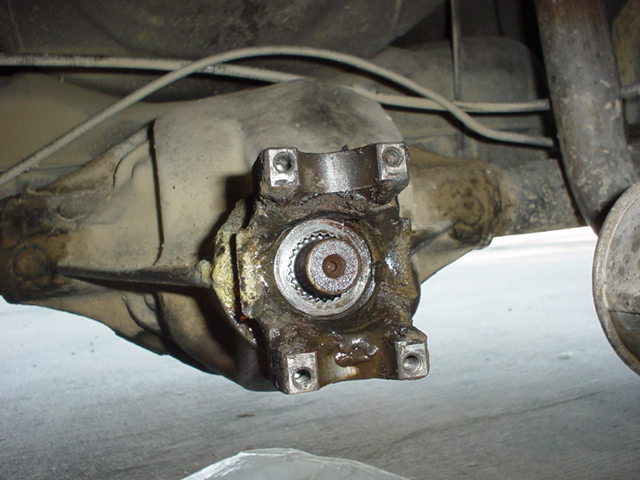
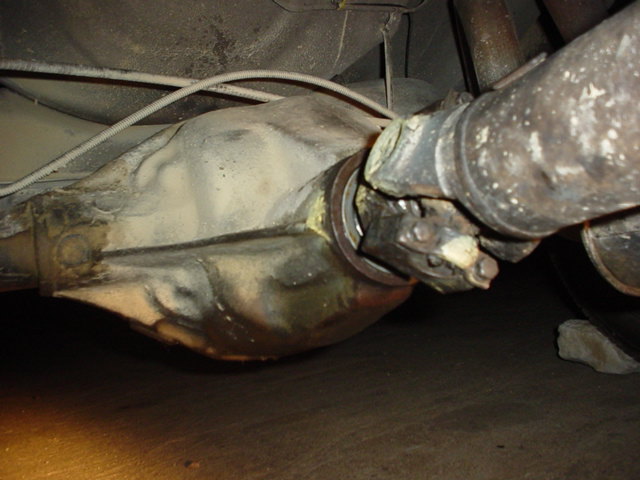
Your starting point will probably look something like mine did
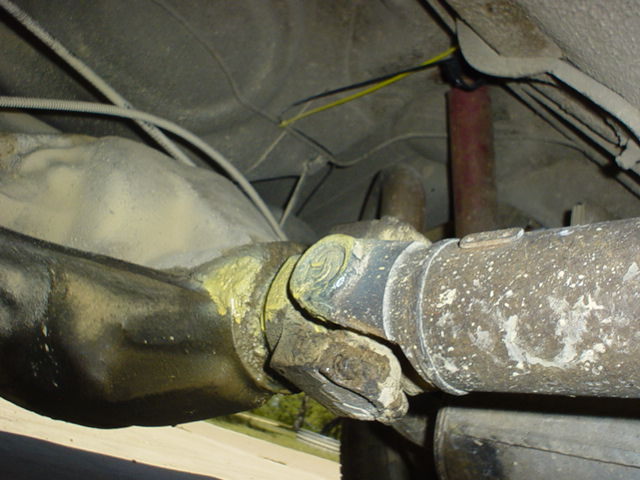
You'll want to clean up a little under there, and then mark what you've got so it goes back in the right place. I used yellow paint because I had yellow paint.
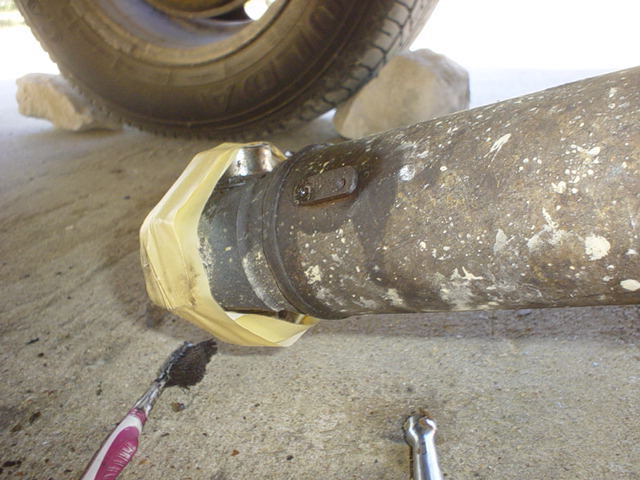
Next, remove the u-joint and tape the caps so you don't end up crawling around under the bird looking for that last little piece. If I'd had the money, this would have been a great time to replace the u-joints.
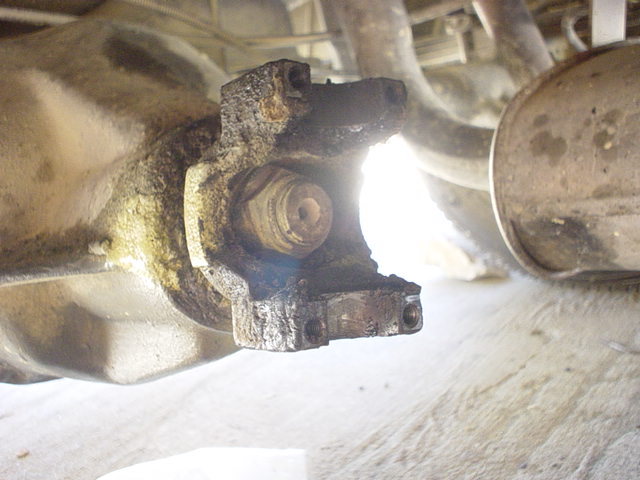
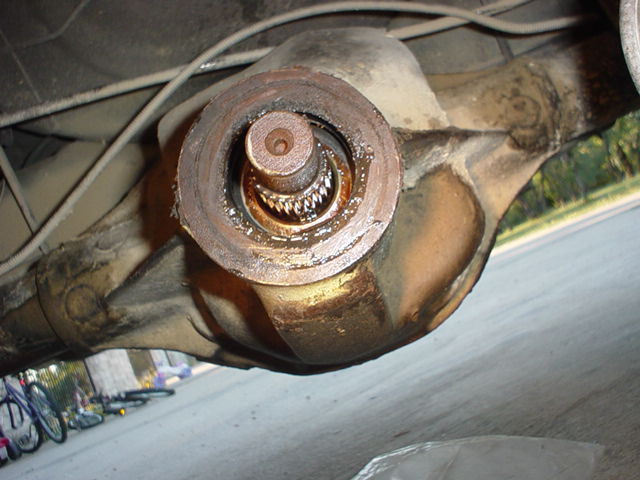
Now for the fun part. You SHOULD use the torque wrench to check the torque it takes to break the nut loose, and then re-torque to that spec+5. Wasn't happening for me. I couldn't even break it loose with a breaker bar and my legs. Borrowed an impact wrench and socket (1 1/8") and had to really lean on it, let compressor catch up, and lean on it again.
Finally got it.
Removed the yoke by gently tapping it out, alternating side to side.
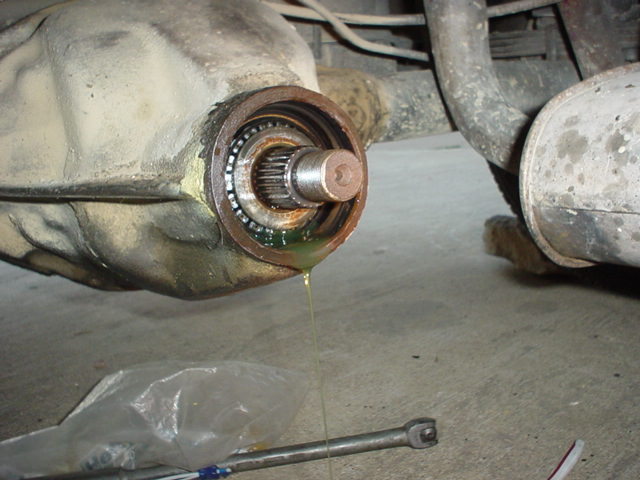
Inspect the yoke for wear or grooving. Mine was O.K. with 154,000 miles. Pry out the old seal with seal remover or screwdriver. Let it drain, and wipe everything down. You don't want a stray hunk of something messing up your new seal.
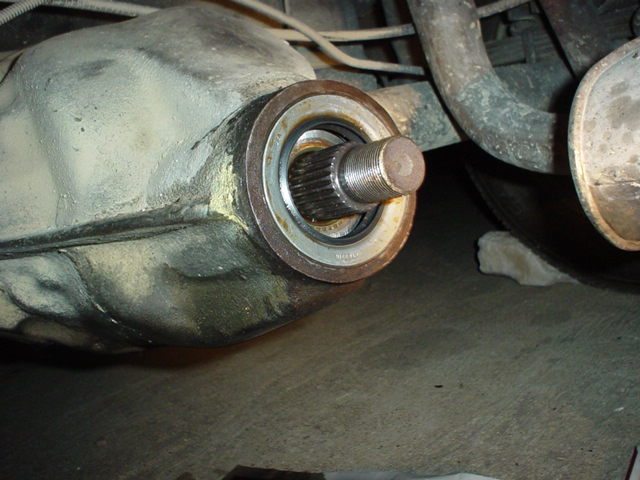
Install new seal. I placed the new one in the hole, trying to keep it even. Then used a piece of pvc pipe with a cap and a couple of smart raps with a hammer. You need to get it seated all the way to where it's flush with the housing.
Put a little clean gear oil on the yoke and slide it in, watch for your marking paint here. Put the nut back on and tighten her down. If you were able to check the torque on removal, re-torque to that spec+5. I had to lean on the impact wrench several times to get loose, so I leaned on the impact wrench several times to install.
Install u-joint, making sure the caps don't come off. Finished product...
Be sure to refill the rear diff., then test drive. I put newspaper under the diff overnight to check for drips. None. I'll check the u-joint straps here in a few days to make sure they're still tight. One less puddle under "The Bird".
