Alternator Rebuild
The Eagle has one of the most common alternators used in cars. It is the Remy Delco 10SI or 12SI. It is easier to buy a reconditioned one, but I like to get my hands dirty, so I bought a kit from Weitzel's in Norwalk Ohio. His Ebay alias is Triodiode and he offers the kit for $12,95. The kit contains two new bearings, new brushes, new triodiode, and new regulator.
First take the alternator out.
Remove the positive from the battery and the two electrical connectors from the alternator.
Remove the splash guard (2 nuts/2screws).
Remove the two bolts (top and bottom) holding the alternator, and remove it from under the car.
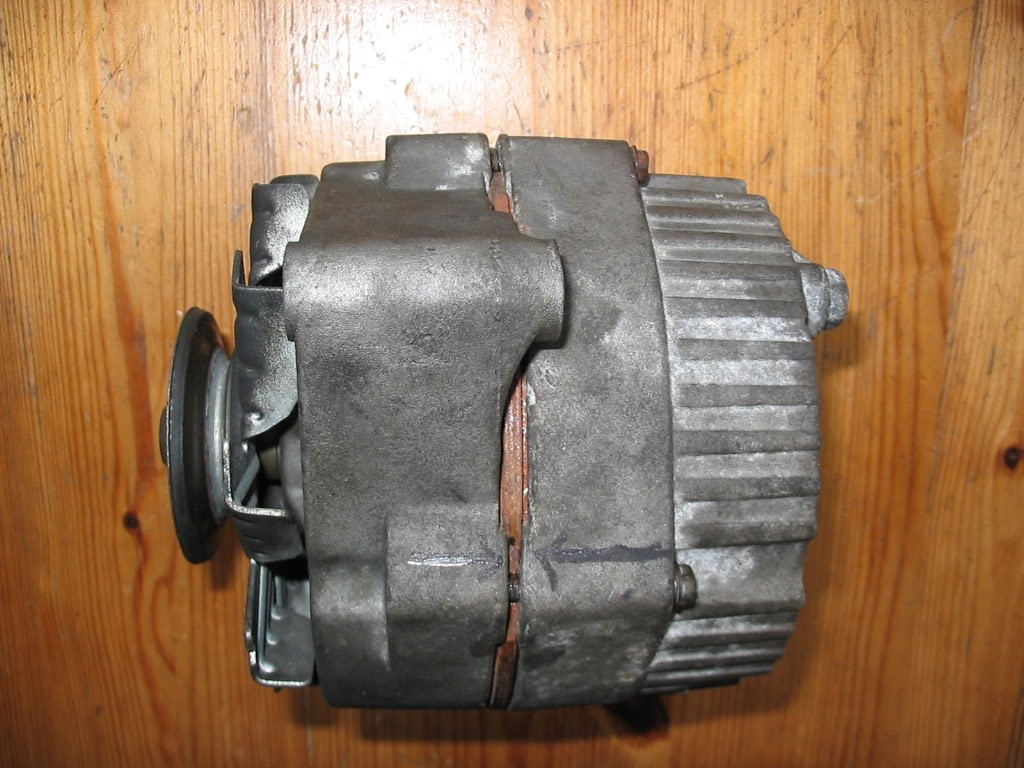
Make a mark on it, so you will know how it goes together.
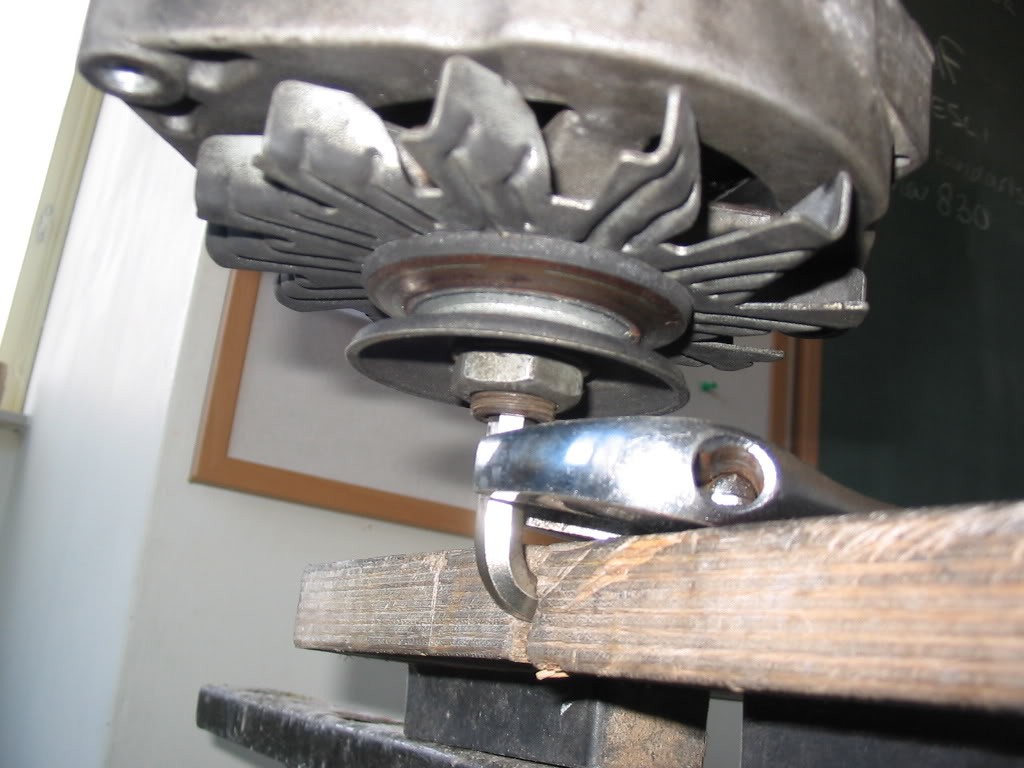
I used my friend for 25 years (B&D Workmate WM747) to help me remove the V-belt sheeve.
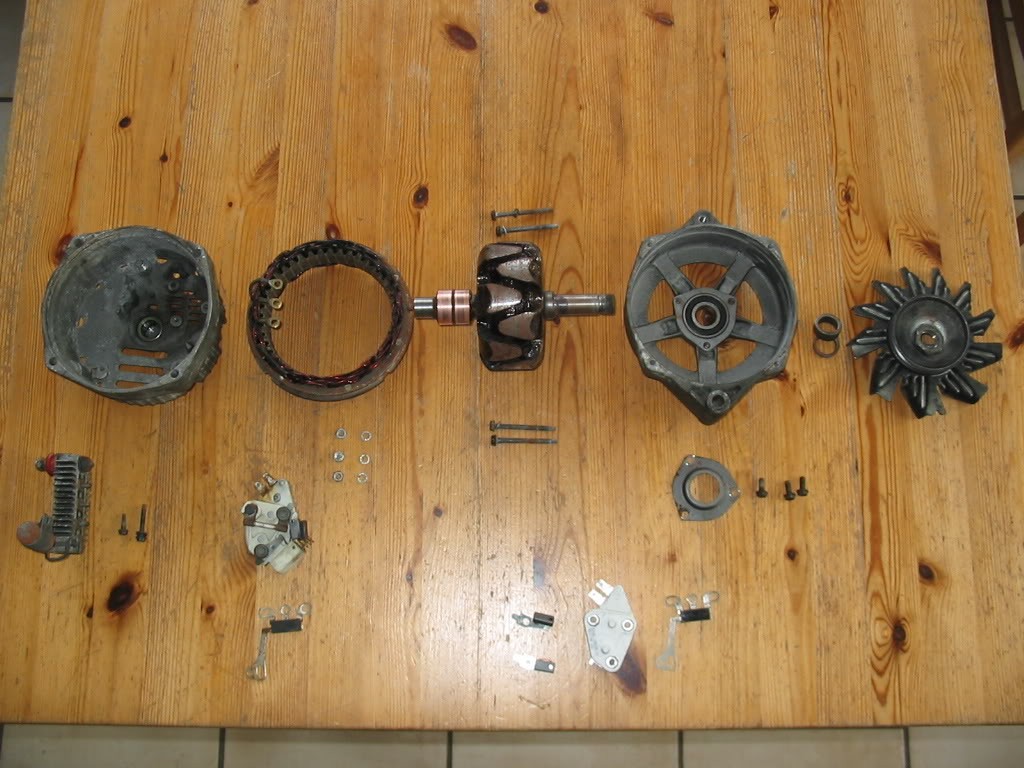
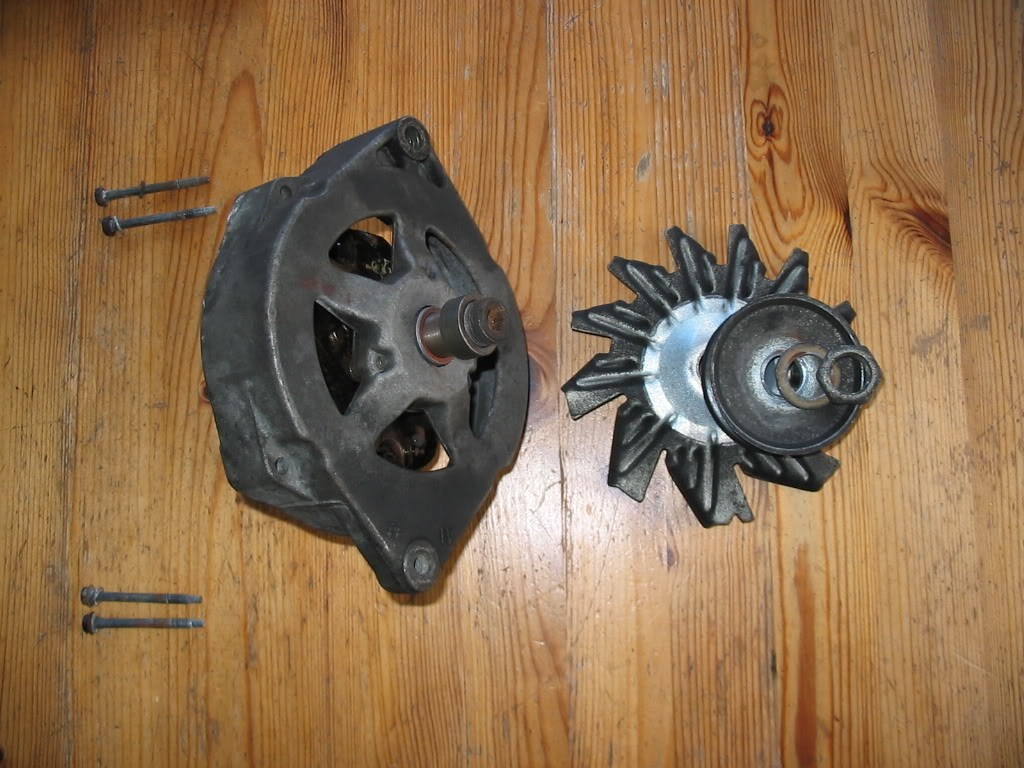
Remove the four small bolts and you can take it apart, after removing everything it will look like this.
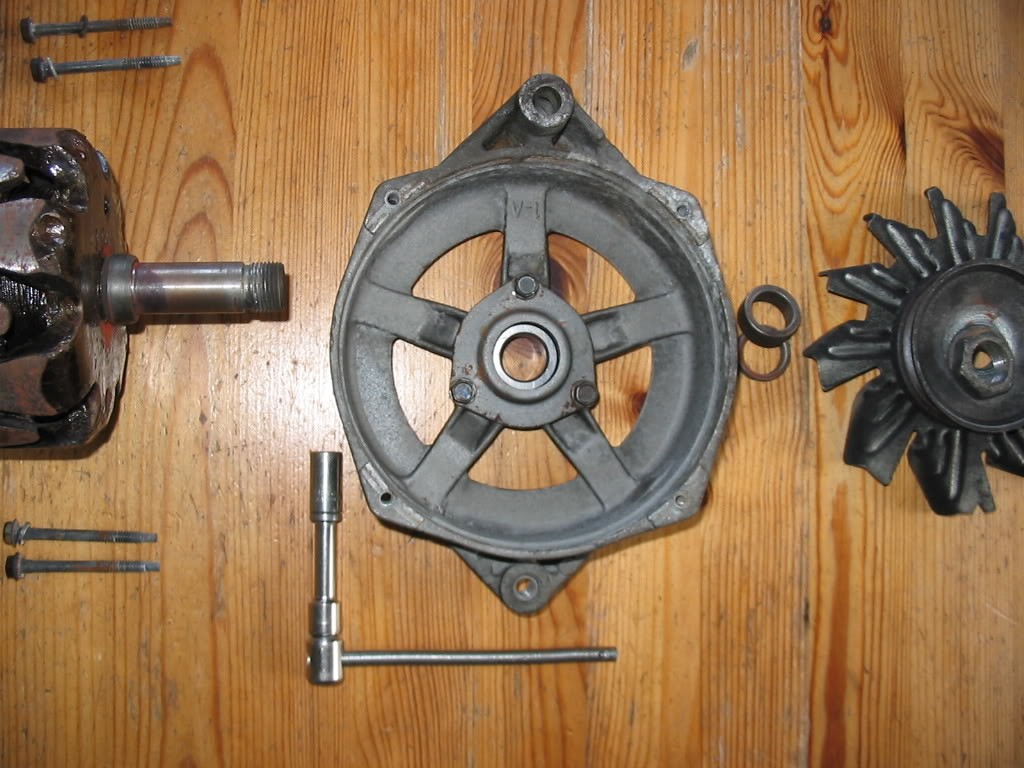
I removed the old bearings from the housing. The front one can be hammered out with the help of a two pound hammer and a socket from the socket wrench set. The front bearing was worn out (making a wining noise in the car). The rear needle roller has to be hammered out the same way, but from the inside to the outside. Mine was rusted tight, so I took a small hobby burner and heated the housing locally. For aluminum this is a good trick, aluminum expands more than steel when heating up. Supported by two pieces of wood, it could be hammered out easily.
After hammering the new bearing in gently, replace the bearing cover with the three small screws.
I cleaned up the copper conductors on the rotor, with some waterproof sandpaper. The front half is ready for reassembly now. The V-belt sheeve can be replaced when everything is back together.
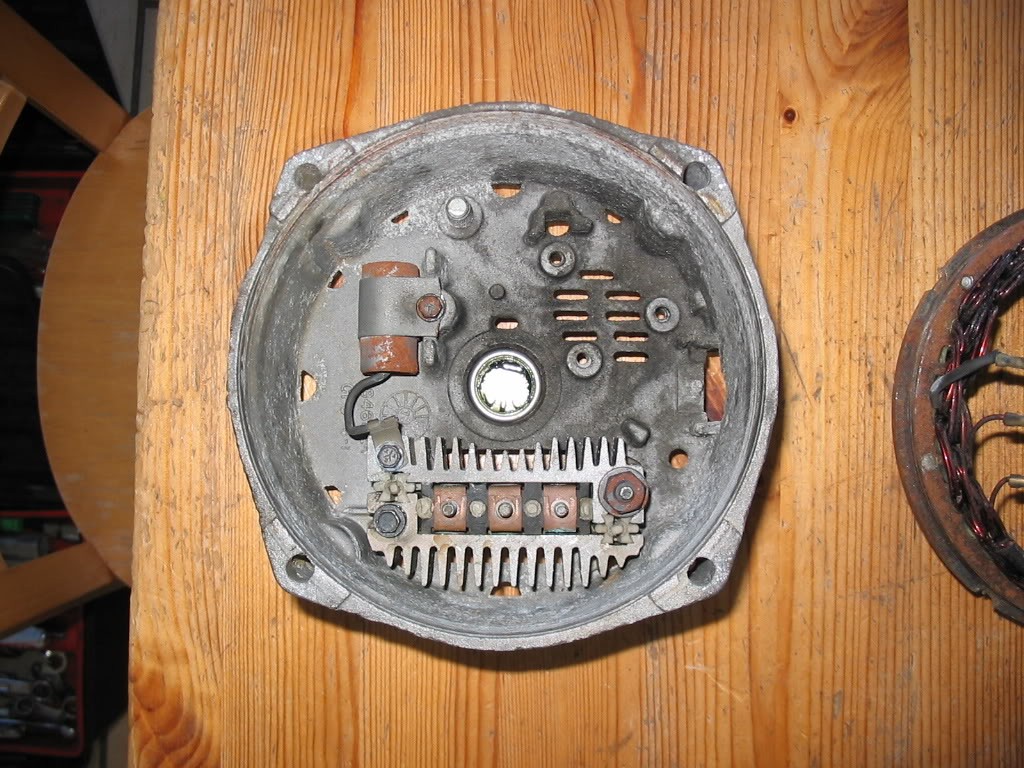
So we can start work on the rear half. First we put in the rectifier and capacitor.
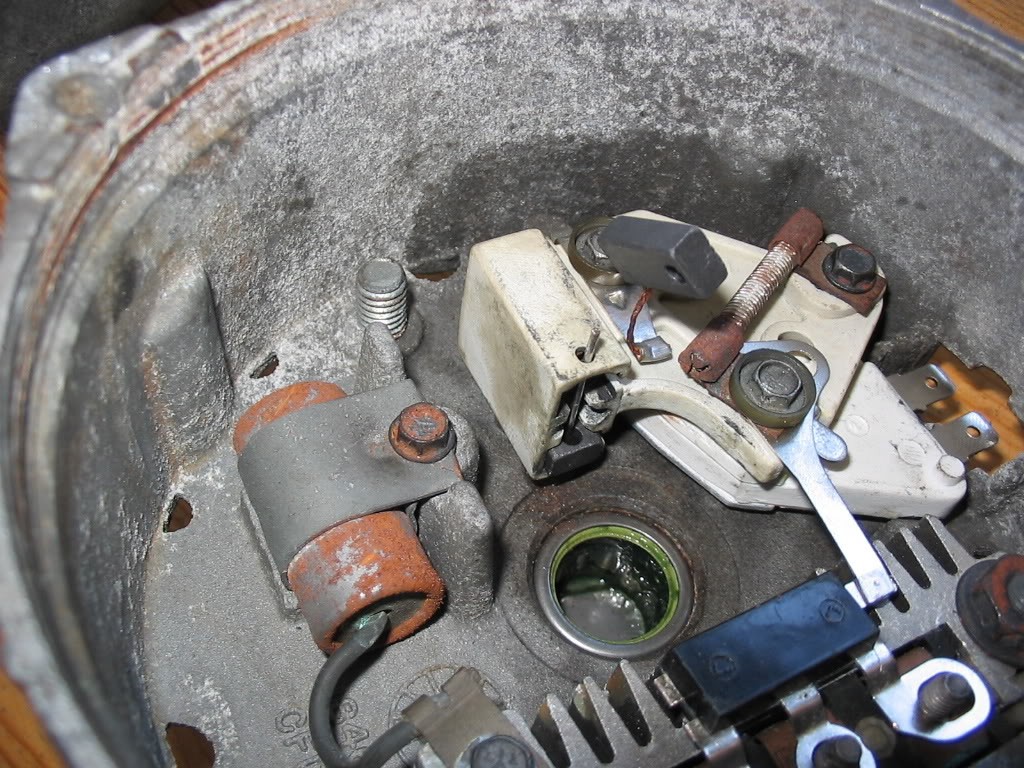
After that we put in the brush housing with new brushes, which is stacked on the new regulator. As soon as it is in, you can push the brushes in the housing and push a pin (I used a paperclip) from the outside through the holes in the brushes. This will hold them in the retracted position until the rotor is fitted.
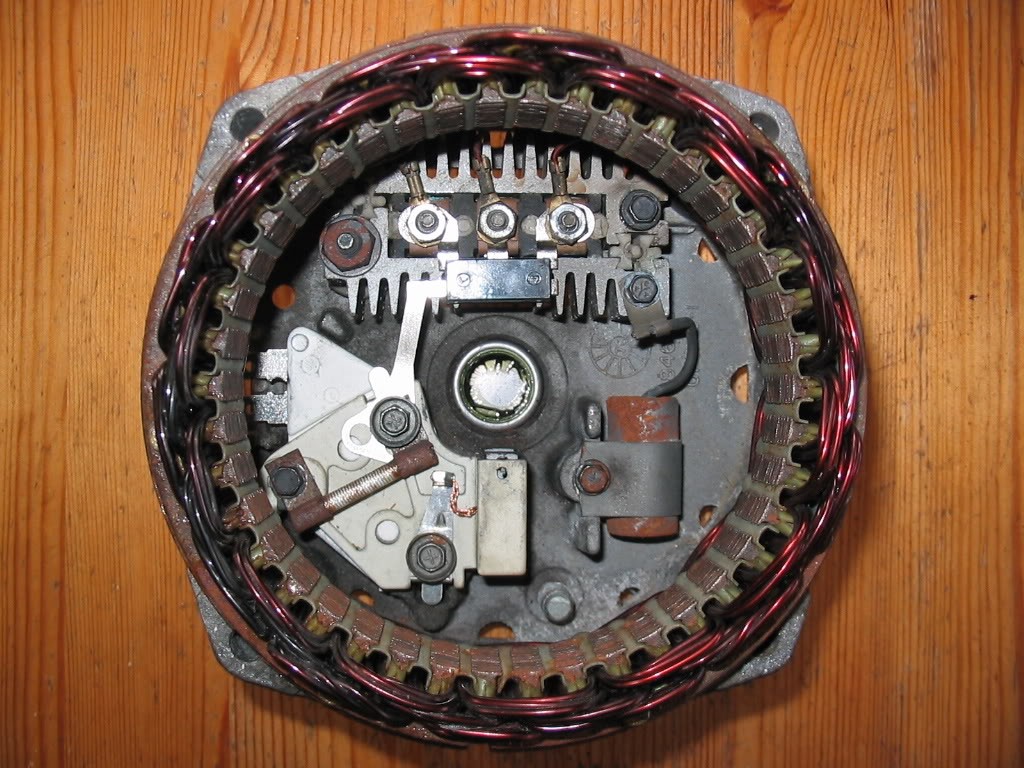
Now we can put the stator back in the housing, and tighten the nuts on the terminals.
The alternator is now ready for reassembly. Slide the front and rear part together (note the marking) and put the four bolts back in. Put the V-belt sheeve back on and use a spanner and Allen key to tighten the nut. Put it back in the car from the bottom side, hang it in the V-belt and put the bolts back in. If the V-belt tension was OK before, it will be OK afterwards too. If not, adjust it by releasing the two alternator bracket bolts and the idler roller centre bolt and use a 1/2" wrench in the square hole of the bracket to pull it tight.
Put the splash guard back in and reconnect the alternator and the positive of the battery.
Start your engine and watch the alternator warning light (should be off) and voltage indicator on the gauge package (should be around 14V).
