Front Brakes Re & Re
Hi, I'm sure a lot of you already know how to replace your brake pads, calipers and rotors, but for those who don't (like me a week ago) I hope this is helpful. If Yan can cook, you can fix your Eagle. There are some steps to do before you get started:
Brake fluid is corrosive and toxic, please don't spill any on your car or yourself! Be safe!
Tools needed
safety equipment (gloves, safety glasses, possible dust mask depending on the condition of your brake pads) tire iron car jack jack stands (please be safe!) ratchet with sockets (9/16 socket for brake hose) 7mm HEX head or allen wrench (torx 45 fitting, thanks Jurjen) 3/8 wrench (for bleeder screw) dot 3/4 brake fluid 3/8" diameter clear vinyl hose (I used about 2.5 feet) empty water bottle calipers/pads/gaskets rotor hose clamp sand paper (40 grit wet/dry? I didn't use any. But make sure it can be used on metal) pliers hammer (the persuader to get old brake shoes off.) screw driver (I used it to push the piston back) c-clamp or piston compressor (may not be necessary, I didn't need one)
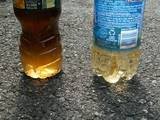
Check your brake system. Look at the brake fluid in the reservoir (located in the engine compartment on the drivers side to the right of the air filter pan) if it looks like anything other than clear apple juice, it could use replacing. The fluid on the left is the old fluid, the right side is new brake fluid.
Take your tire off and look at the brake calipers/pads/rotors. If you can, take off the caliper to look around, but support it as long as the brake fluid hose is connected. Take a look for yourself even if a shop tells you everything is fine, brakes are important for everyone's safety.
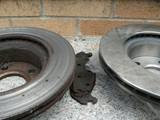
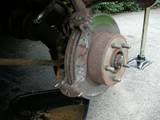
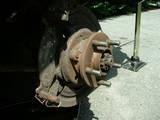
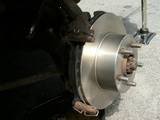
Worn out rotor on the left (very scarred from bare brake shoe contacting the rotor) and new rotor on the right
Worn brake pads:
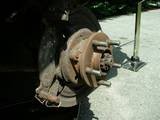
Total assembly (looks awful, but sometimes they look like this and are quite functional)
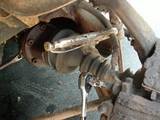
Loosen the head on the fluid reservoir, but leave it on the reservoir to prevent fluid from squirting in your engine compartment or hood, it will damage paint. To take off the caliper completely, clamp the brake hose tightly to close any flow of brake fluid, use a 7mm hex head to get to the caliper mounting pins and loosen them up. (where the ratchet is holding on) Make notice of where the bleeder valve and line-in are so you can match a replacement caliper in. Place a catch bin under the whole assembly to catch any spilled brake fluid (safety first!)
Now to take off the brake hose. I didn't snap a pic of this, but looking where the brake hose attaches, you can see the bolt attached to the caliper. Making sure your brake hose is clamped, use the 9/16 socket (that's what mine was) and loosen the bolt. Let the fluid drain out into the bin, shouldn't be a lot. Take the bolt out and move the hose out of the way.
Back to the caliper, loosen the brake pad springs with pliers and screw driver. (my fingers couldn't do it) Loosen the mounting pins fully until they are no longer in the mounting bracket, and the caliper should either come loose, or you might need to compress the piston with a c-clamp. Brake fluid is still inside the caliper and will spill out where the brake hose attached if you compress the piston. Empty the fluid of the caliper into the bin if you plan on changing your fluid or replacing the caliper.
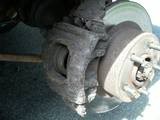
Caliper removed with brake pads still on.
You can then remove the outer brake pad by pulling the shoe off the mounting bracket, you might need a hammer, I did. Be gentle! The rotor should be free now and you can pull that off to get access to the inner brake shoe. Once the shoe is off you can then clean things up a bit. Remove any flaky rust, sand it a little if it seems really bad. Take the brake fluid bolt off the line. There should be copper gaskets on either side of the line, these should be replaced if you are replacing your caliper or they look worn. They usually come with the calipers. Clean the bolt off to remove any old brown residue. Now mount the inner brake shoe (match the curve of the rotor!) and put the rotor back on (or a new rotor in) Remember not to get any brake fluid on the pads or rotor as it can damage the pads.
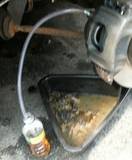
Put the outer brake shoe on and move the springs back into place so they put pressure on the shoes. The caliper can be put on now. Match up the orientation of the caliper so that the brake line can attach. Make sure the copper gaskets are in place on the bolt and screw the bolt back in to the caliper and tighten it up tight. Now you can bleed the air from the brake lines. Brake fluid is not compressible and air is so make sure you have no air in your brake lines. Check the reservoir to see that it is full of clean brake fluid and make sure the cover is on but not clamped down. You can do this with a partner or without, this is the without method. I did not use a fancy vacuum bleeder (which makes it nice and simple!) but this method is simple and works. Attach the vinyl hose to the bleeder screw. Fill the empty water bottle with about 2 inches of brake fluid. Submerge the end of the vinyl in the brake fluid, this creates a vacuum so air won't get back into the caliper and lines. Loosen the bleeder screw with the 3/8 wrench until it is loose, but still in the caliper. Pump the brakes several times until you see fluid in the vinyl tubing. You'll see air bubbles as well. Top up the reservoir with brake fluid and go back and pump the brakes some more, keep pumping and checking fluid until when you pump the liquid in the tube moves and no air bubbles are present. Your line is all fluid, tighten the bleeder screw back up, then remove the vinyl hose.
Put your tire back on and you should be set! If your reservoir runs out of fluid, there is most likely air in your lines and you should bleed all your brake lines (you don't need to remove the tires for this) starting with the rear passenger side wheel farthest from the master cylinder and reservoir and continue closer by doing the rear drivers side lines, then front passenger side lines, then front drivers side lines. Safe brakes mean our Eagles can fly!
